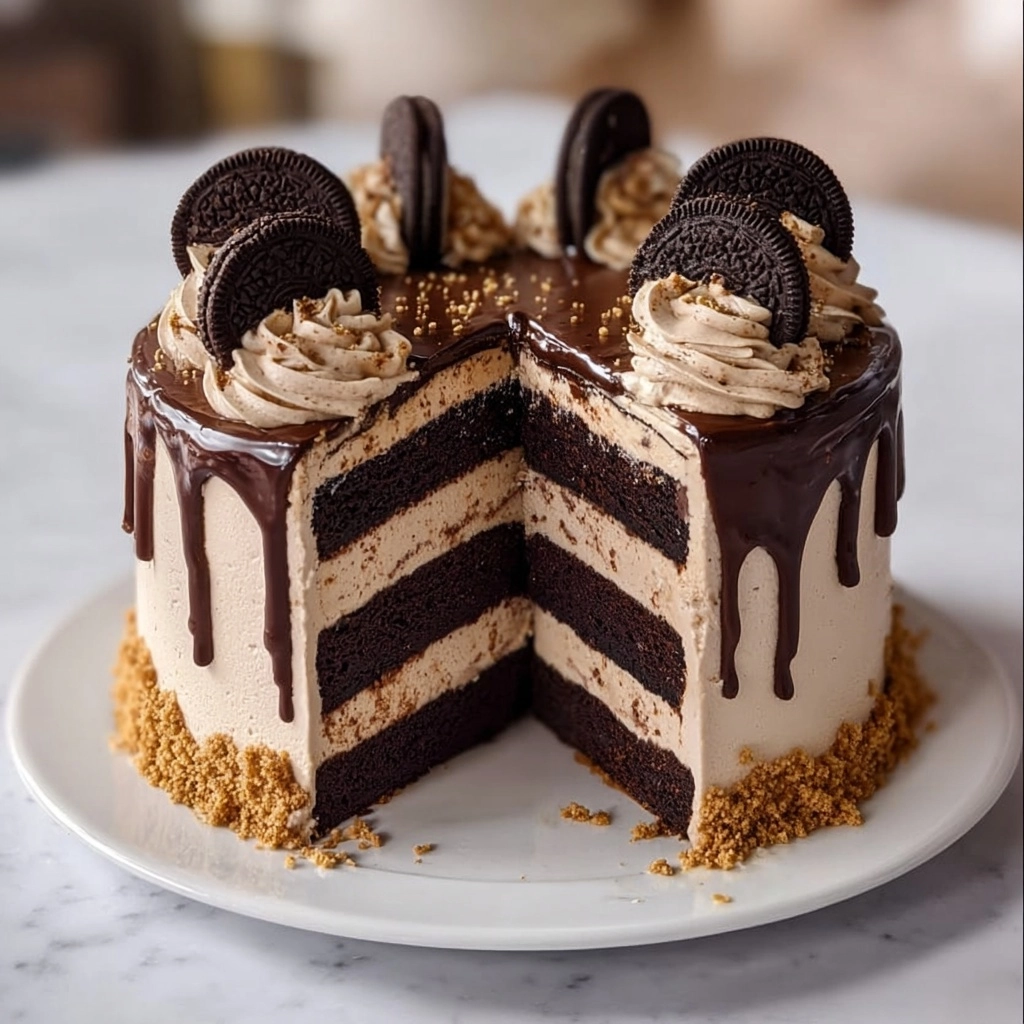
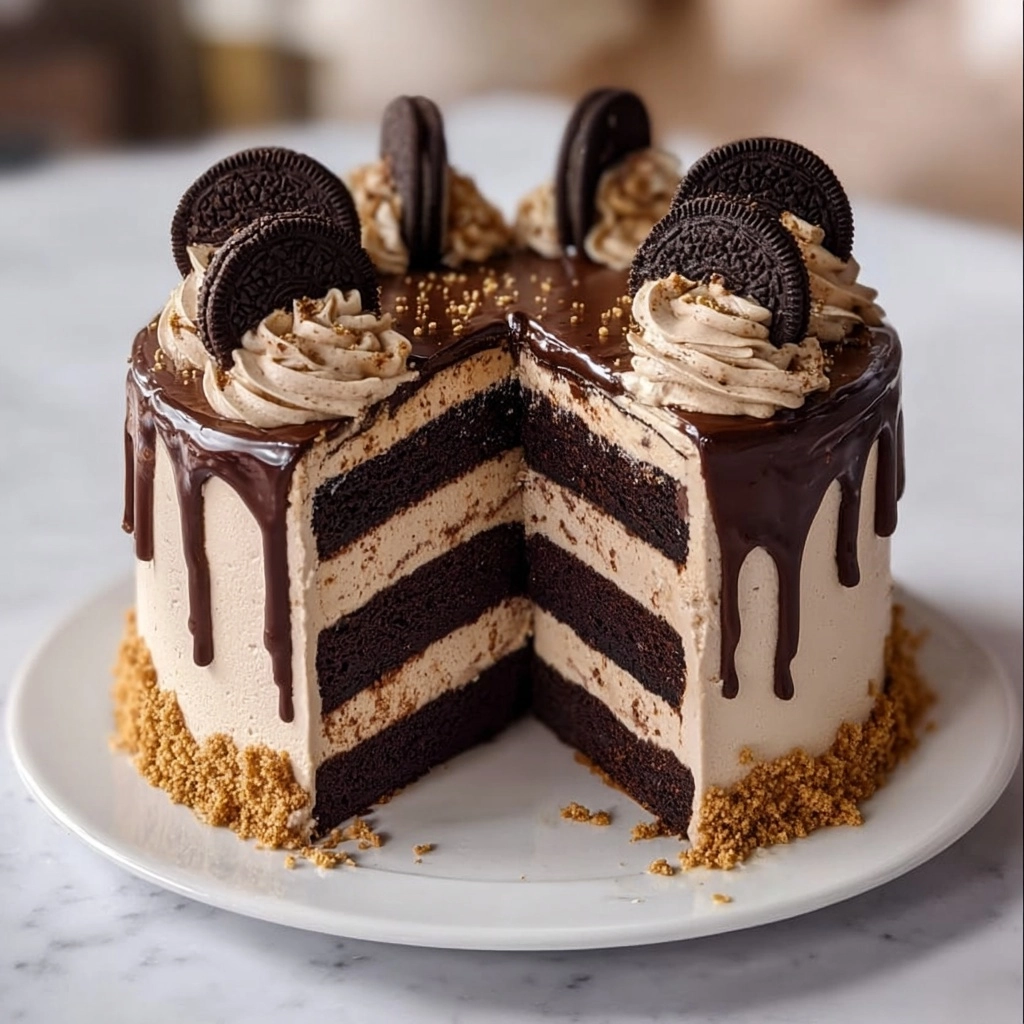
If you’re a lover of all things cookies, cream, and chocolate, this Oreo Chocolate Layer Cake with Cream Filling will quickly earn a treasured spot in your baking repertoire. Imagine four ultra-moist layers of decadent chocolate cake, each generously sandwiched with fluffy whipped Oreo cream, all wrapped in a cookies-and-cream-studded buttercream, then finished with playful Oreo garnishes. Whether you’re celebrating a birthday, hosting a party, or simply craving an over-the-top treat, this cake is a showstopper that’s as fun to make as it is to share (and eat!).
Ingredients You’ll Need

Ingredients You’ll Need
Every ingredient for this Oreo Chocolate Layer Cake with Cream Filling has a specific, scrumptious role, coming together to create an irresistibly moist, rich, and creamy dessert. With a handful of baking basics plus, of course, plenty of Oreos, each element delivers the signature flavors and textures fans adore.
- All-purpose flour: Provides the essential structure that keeps the cake layers tender yet sturdy for stacking.
- Unsweetened cocoa powder: Packs in deep chocolate flavor—make sure to use a good quality powder for best results.
- Sugar: Sweetens the cake and helps lock in moisture for that melt-in-your-mouth crumb.
- Baking soda and baking powder: The dynamic duo that gives the cake its generous rise and fluffy bite.
- Salt: Just a teaspoon brings all the chocolate notes into harmony, enhancing every rich bite.
- Large eggs: Bind everything together and add that signature cakey texture.
- Buttermilk (or milk + vinegar): Ensures a slightly tangy flavor and ultra-tender crumb—don’t skip it!
- Vegetable oil: Makes the cake exceptionally moist and helps it stay soft for days.
- Vanilla extract: Rounds out the flavors for a balanced, bakery-style finish.
- Hot coffee (or water): Intensifies the chocolate flavor—hot liquid also helps the cocoa “bloom.”
- Heavy whipping cream: Whips up into the luscious Oreo cream filling that tastes like a dream.
- Powdered sugar: Sweetens and stabilizes both the filling and the frosting for that classic creamy texture.
- Crushed Oreo cookies: The heart and soul of this recipe, adding crunch and true cookies-and-cream flavors throughout.
- Unsalted butter: The base for a fluffy, silky frosting that pairs deliciously with chocolate layers.
- Whole Oreos (for decoration): Finish off your creation with iconic black-and-white flair—these look stunning along the top of the cake.
How to Make Oreo Chocolate Layer Cake with Cream Filling
Step 1: Prepare and Bake the Cake Layers
Preheat your oven to 350°F (175°C) and get those 8-inch round cake pans greased and lined. In a big mixing bowl, whisk together the flour, cocoa, sugar, baking soda, baking powder, and salt. This ensures all the dry ingredients are evenly incorporated, leading to uniform layers. Add in your eggs, buttermilk, oil, and vanilla, mixing until everything is smooth and chocolatey. Finally, stir in the hot coffee slowly—the batter will be very thin, but that’s exactly what you want for a light, moist crumb. Pour the batter evenly between your pans and bake for 30–35 minutes. A toothpick should come out clean when they’re ready. Let the cakes cool completely before you start to assemble.
Step 2: Make the Creamy Oreo Filling
While your cakes cool, whip up the Oreo cream filling. In a chilled bowl, beat the heavy whipping cream, powdered sugar, and vanilla extract until stiff peaks form—this step makes the filling airy and stable. Gently fold in the crushed Oreos, taking care not to deflate the cream. Pop it into the fridge until you’re ready to build the cake; this helps it set up perfectly between the layers.
Step 3: Whip Up the Oreo Buttercream Frosting
For the frosting, beat the butter until it’s light and creamy, then gradually add in the powdered sugar. Mix in the heavy cream and vanilla for fluffiness, and finish with more crushed Oreos for bits of crunch and extra cookies-and-cream flavor. The frosting should be thick and luscious, ideal for both spreading and piping.
Step 4: Assemble the Oreo Chocolate Layer Cake with Cream Filling
Carefully slice each cooled cake to make a total of four layers. Place one on a cake stand, then spread a generous layer of Oreo cream filling evenly over the top. Repeat with the remaining cake layers and filling—don’t worry if it doesn’t look perfect, the frosting will cover it all! Once stacked, use the Oreo buttercream to frost the outside of the cake completely, smoothing it as best you can. This is what gives you that stunningly uniform finish lovers of the Oreo Chocolate Layer Cake with Cream Filling will recognize.
Step 5: Decorate for Wow Factor
Time for the final flourish! Pipe buttercream swirls on top for a bakery-worthy look, then anchor whole Oreos around the edge for a dramatic (and delicious) border. Scatter extra Oreo crumbs over everything to make an irresistible first impression—no one can resist a slice!
How to Serve Oreo Chocolate Layer Cake with Cream Filling
Garnishes
A beautiful finish makes this cake party-ready! Pipe tall, even swirls of cookies-and-cream frosting along the top, tucking a whole Oreo into each one. A generous sprinkle of Oreo crumbs adds a dramatic, textural look that pairs perfectly with the sleek side frosting. If you’re feeling extra, drizzle a little chocolate sauce or scatter some mini chocolate chips for added pizzazz.
Side Dishes
This cake is incredibly rich, so pair slices with simple accompaniments like a scoop of vanilla ice cream, fresh strawberries, or even a tall glass of cold milk. If you’re serving at a party, a coffee or tea bar is always a hit and balances the sweetness of the Oreo Chocolate Layer Cake with Cream Filling.
Creative Ways to Present
For a twist, try serving individual mini versions by cutting the cake into cubes and layering in parfait glasses with extra cream and Oreo crumbs. Alternatively, you can create cake pops with leftover scraps—just roll cake and frosting together, dip in chocolate, and top with Oreo crumbs for an adorable treat. Individual slices on little plates with a dollop of extra cream always look extra elegant, too.
Make Ahead and Storage
Storing Leftovers
Thanks to the moisture from the cream and buttermilk, Oreo Chocolate Layer Cake with Cream Filling stays luscious for up to 3 days. Cover it snugly with plastic wrap or an airtight cake dome, and keep refrigerated. Let it sit out for 20–30 minutes before serving so the cake and frosting can soften—this makes all the flavors pop.
Freezing
If you want to save some for later, you absolutely can! Wrap individual slices or the entire cake tightly in two layers of plastic wrap, then in foil, and freeze for up to 2 months. To thaw, move the cake to the fridge overnight—the texture and flavor will stay just as dreamy as day one.
Reheating
While this cake is best enjoyed chilled or at room temperature, if you like a slightly warmer bite, let a slice sit on the counter for 20 minutes. For a soft, almost molten center, you can microwave a slice for just 8–10 seconds (watch it closely so it doesn’t melt!), letting the Oreo cream filling become extra luxurious.
FAQs
Can I make the cake layers ahead of time?
Absolutely! The cake layers can be baked up to two days in advance. Let them cool completely, then wrap each one tightly in plastic wrap and store at room temperature, or refrigerate if you’re planning to assemble later in the week.
Do I have to use coffee in the chocolate cake?
If coffee isn’t your thing, feel free to use hot water instead. Coffee simply deepens the chocolate flavor, but the cake stays rich and moist either way. You truly won’t taste the coffee, just intensified chocolate.
What’s the secret to keeping the filling fluffy?
The key is to whip the heavy cream until stiff peaks form, then gently fold in the Oreos. If you overmix, the filling can deflate, so a gentle hand is your best friend here for a dreamy, cloud-like texture in every layer.
Can I use store-bought frosting instead?
While homemade frosting gives you that extra cookies-and-cream flair, you can use your favorite store-bought vanilla or chocolate frosting in a pinch. Boost it by stirring in extra crushed Oreos before frosting your layers!
Is there a gluten-free option for Oreo Chocolate Layer Cake with Cream Filling?
You can easily adapt this recipe by using your favorite 1:1 gluten-free flour blend for the cake, and gluten-free Oreo-style cookies throughout. The result will be just as mouthwatering and party-ready as the original!
Final Thoughts
Nothing brings people together quite like a slice of this Oreo Chocolate Layer Cake with Cream Filling. Whether it’s a special celebration or a “just because” baking session, each mouthful promises nostalgia, decadence, and pure joy. If you’re looking to wow your friends and family with a crowd-pleasing showstopper, this cake is calling your name. Try it soon and see how quickly it becomes a new favorite!

