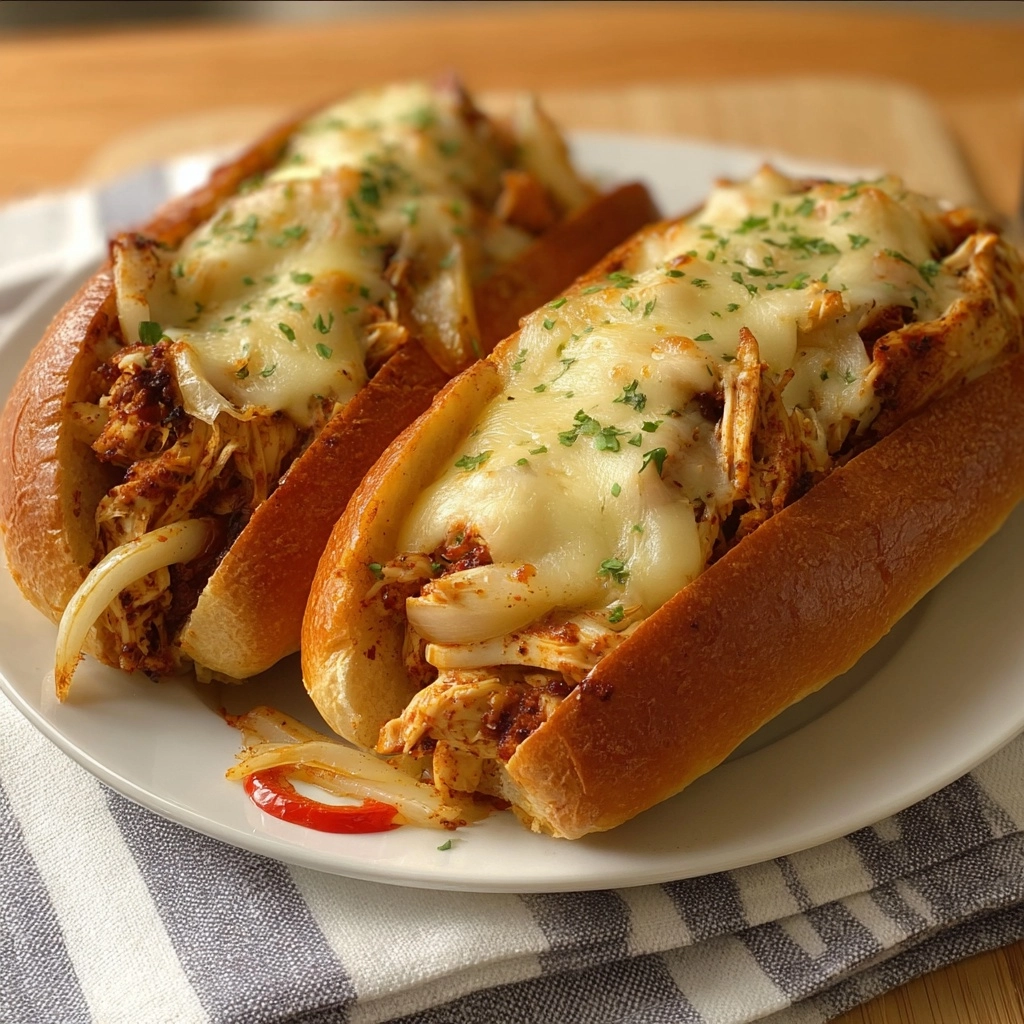
If you’re tired of bland lunches, then get ready to fall in love with Loaded Chicken Subs. Imagine juicy strips of seasoned chicken bursting with flavor, caramelized onions and bell peppers, gooey melted cheese, and all the fresh toppings you love piled into a toasted roll. It’s easy enough for a weeknight bite but will make you feel like a sandwich superstar every time. Let’s roll up our sleeves and dive into this mouthwatering creation that’s become my go-to hero meal!

Ingredients You’ll Need
The beauty of these Loaded Chicken Subs is how every ingredient has a job to do—bringing flavor, texture, and even a pop of color to your plate. You don’t need anything fancy, but together, these basics create pure sandwich magic!
- Chicken breasts: Use boneless, skinless chicken breasts cut into strips—this keeps every bite tender and lets that seasoning shine.
- Olive oil: A couple of tablespoons of olive oil are just enough to give the chicken a gorgeous, golden sear and to sauté the veggies to perfection.
- Garlic powder: Adds an irresistible aromatic layer without the need for chopping fresh garlic.
- Smoked paprika: This brings a subtle smokiness and beautiful color; don’t skip it if you love bold flavor!
- Salt and pepper: Trusty basics that round everything out; season to taste for balanced flavor in every bite.
- Sub rolls: Look for hearty, bakery-fresh sub rolls; toasting them makes all the difference between a good sub and a great one.
- Shredded mozzarella or provolone cheese: Mozzarella is melty and mild, while provolone brings a touch of tang; either way, you’re getting that glorious cheese pull.
- Onion: Thinly sliced onions caramelize quickly and add delicious sweetness and depth.
- Bell pepper: Sliced bell peppers contribute vibrant color and a bit of crunch—feel free to use any color you love.
- Mayonnaise (optional): A light swipe of mayo creates a creamy base and keeps things moist without overpowering other flavors.
- Lettuce, tomato slices, or pickles (for garnish): These fresh toppers add zing, crunch, and a cooling finish that plays perfectly with all that cheesy, savory goodness.
How to Make Loaded Chicken Subs
Step 1: Cook the Seasoned Chicken
Heat your olive oil in a large skillet over medium heat. Add the chicken strips, sprinkle over the garlic powder, smoked paprika, salt, and pepper, then cook them up until they’re golden on the outside and deliciously juicy on the inside—about 6 to 8 minutes. Stir occasionally so all sides get a nice sear and the seasoning is evenly distributed.
Step 2: Sauté the Onions and Peppers
Once the chicken is cooked, pull it out and set it aside. In the same skillet (no need to clean—those little bits left behind add major flavor!), toss in your sliced onions and bell peppers. Sauté them over medium heat until they’re soft, sweet, and caramelized, giving everything a stir now and then. This usually takes about 5 to 7 minutes, but the aroma will tell you when they’re ready!
Step 3: Toast the Sub Rolls
While those veggies finish up, pop your sub rolls under the broiler or onto a hot skillet. Toasting really makes a difference—it gives your bread a gentle crispiness that stands up to all those hearty fillings. Watch closely; they only need a minute or two to get perfectly golden.
Step 4: Layer and Assemble
Spread a little mayonnaise on the inside of each warm roll if you like extra creaminess. Now, start layering—pile on the chicken first, then follow with your caramelized onions and bell peppers. Sprinkle a generous handful of shredded cheese over the top so it’s ready for melty magic.
Step 5: Melt and Top
Slip the assembled subs under the broiler just until the cheese bubbles and everything is piping hot—usually 1 to 2 minutes max! Finish with fresh toppings like crisp lettuce, juicy tomato slices, or tangy pickles for the ultimate Loaded Chicken Subs experience.
How to Serve Loaded Chicken Subs

Garnishes
For that extra wow, scatter some thinly sliced green onions, sprinkle with chopped parsley, or add a drizzle of your favorite hot sauce before serving. Fresh garnishes like lettuce, tomatoes, and pickles don’t just look vibrant—they add the perfect snap and freshness to balance the richness of your Loaded Chicken Subs.
Side Dishes
Classic sides work beautifully here: think kettle-cooked chips, a handful of crunchy coleslaw, or even a simple green salad. That cool, crisp contrast makes the hearty sandwich feel extra special, and everyone can pick their own adventure for the plate!
Creative Ways to Present
Let your subs steal the spotlight! For game-day spreads, slice each Loaded Chicken Sub into thirds and serve them on a platter with toothpicks for easy sharing. Or get playful and set out a topping bar so everyone can load up their own sub just how they like it—build-your-own night is always a hit.
Make Ahead and Storage
Storing Leftovers
If you have extra Loaded Chicken Subs or extra fillings, store them in airtight containers in the fridge for up to 3 days. For best texture, keep bread and fillings separate so your rolls don’t get soggy before round two!
Freezing
You can freeze the cooked chicken, peppers, and onions for up to a month. Let the mixture cool completely, then pop it into freezer-safe bags or containers. Freeze the rolls separately, and always hold off on the cheese and fresh garnishes until you’re ready to eat.
Reheating
To reheat, warm the chicken and veggie filling gently in a skillet until heated through. Toast your rolls and then assemble with cheese before giving them a quick broil for that freshly-melted top. Add your cool toppings last for crunch and brightness.
FAQs
Can I use chicken thighs instead of breasts?
Absolutely! Chicken thighs are even juicier and pack lots of flavor. Just slice them into strips and cook as you would the breasts.
What other cheeses can I try?
If you’re feeling adventurous, try pepper jack for spice, Swiss for a nutty twist, or even a sharp cheddar for extra punch. The Loaded Chicken Subs are all about making it your own!
Are these subs spicy?
The basic recipe isn’t spicy, but you can easily add some heat by tossing red pepper flakes into the seasoning or finishing your sub with jalapenos or your favorite hot sauce.
Can I make Loaded Chicken Subs gluten-free?
Definitely! Pick your favorite gluten-free sub rolls and double-check that your cheese and spices are gluten-free. Everything else is naturally friendly to those avoiding gluten.
What’s the best way to prep for a party?
Cook and slice the chicken and veggies ahead of time, then set up a sub-building station with toasted rolls, cheese, and all the toppings. Keep fillings warm in the oven and let guests build their ultimate Loaded Chicken Subs right at the table!
Final Thoughts
These Loaded Chicken Subs deserve a top spot on your regular dinner roster—there’s just something comforting (and exciting!) about a sub piled high with melty, savory goodness. Bite in, enjoy every cheesy, crunchy, juicy layer, and don’t be surprised if these become your new favorite way to do sandwich night. Give them a try—you’ll be hooked after the first bite!

