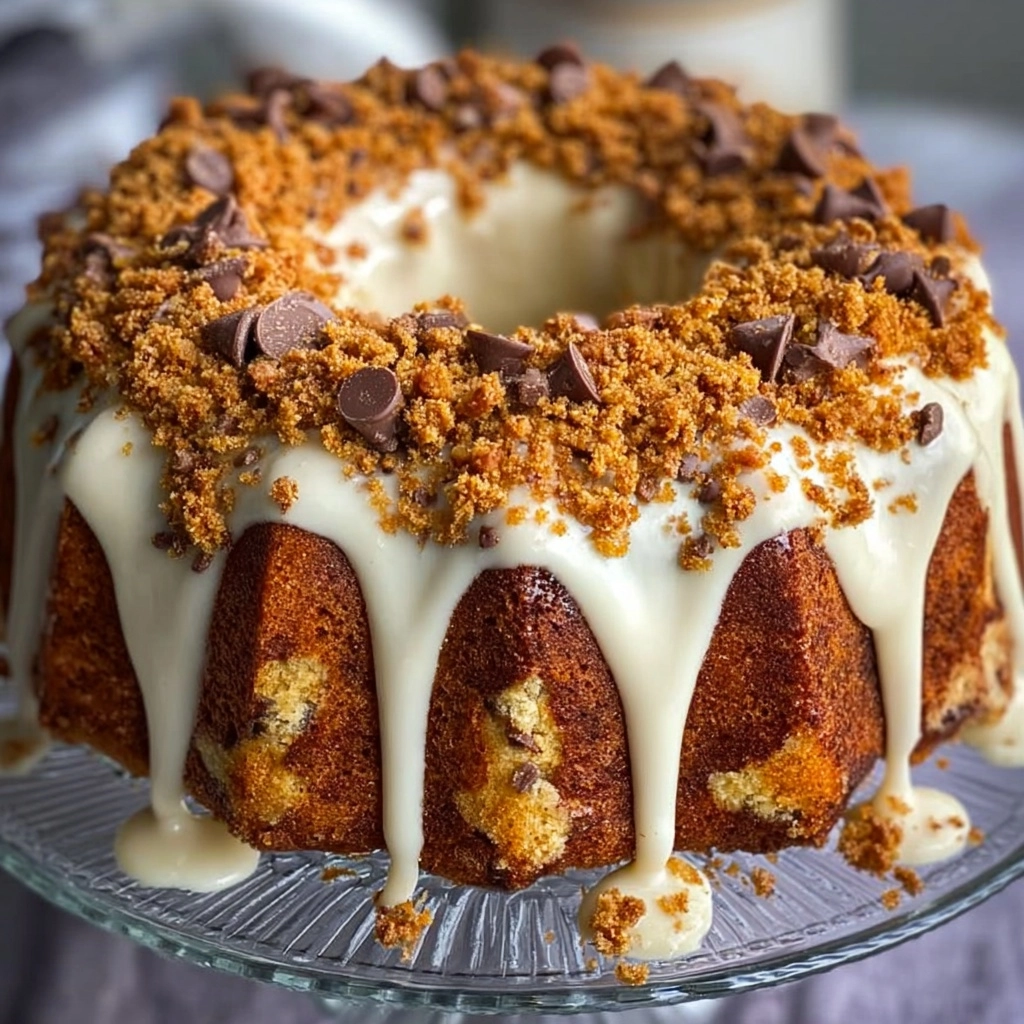
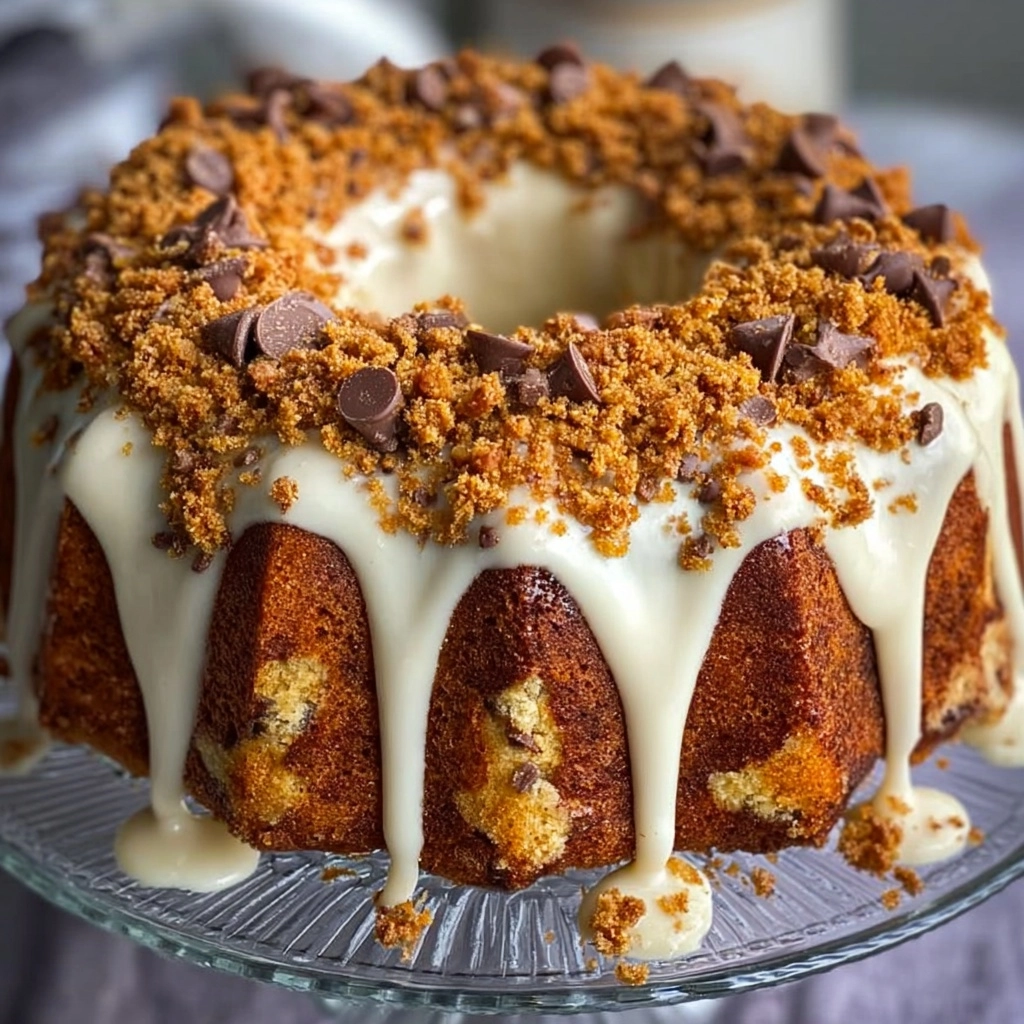
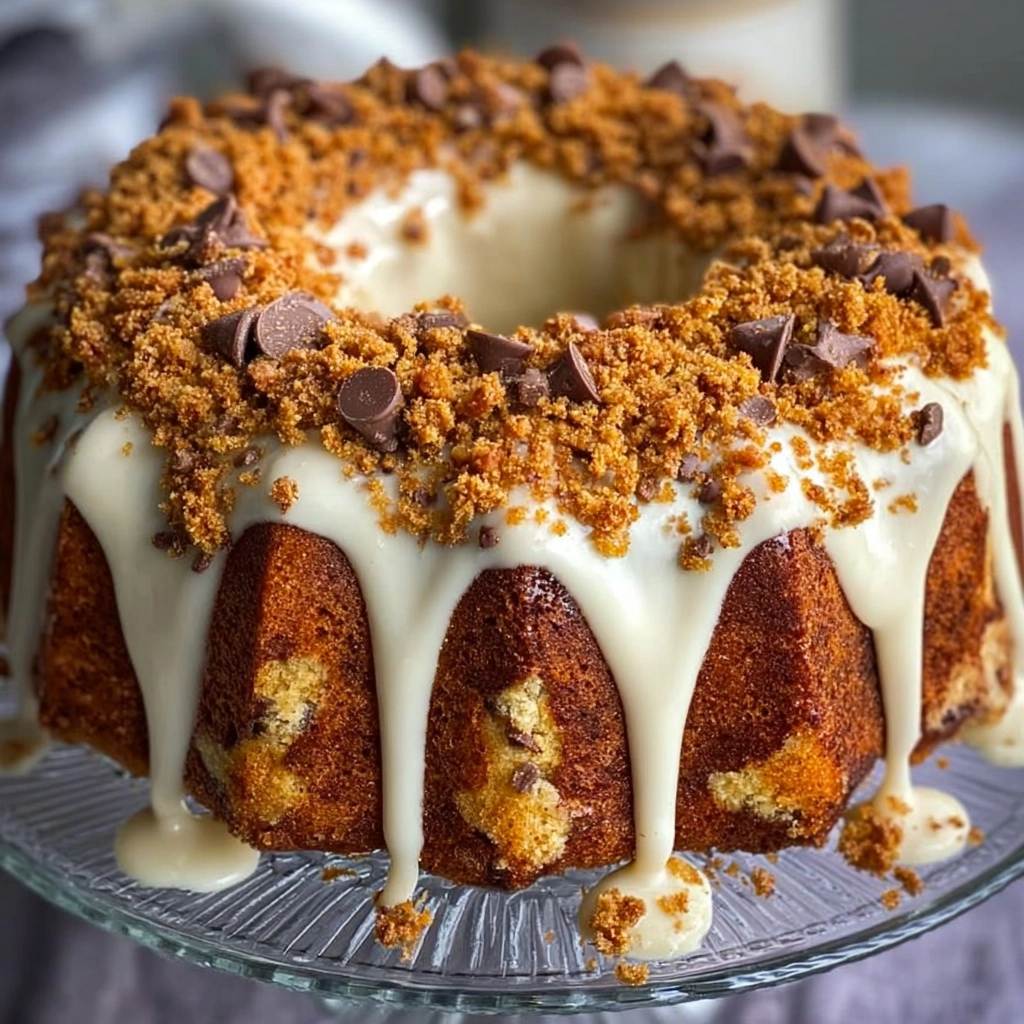
If you’re searching for the ultimate crowd-pleaser to bring to your next potluck or simply want to make your family swoon, look no further than Butterfinger Bundt Cake. Imagine tender, buttery cake loaded with rich peanut butter, flecks of chocolate, and those irresistible Butterfinger candy bits in every bite, then crowned with a silky peanut butter glaze and even more crunchy candy topping. This showstopper doesn’t just taste incredible—it positively steals the spotlight at any gathering. Trust me: Butterfinger Bundt Cake is about to become your most-requested recipe!

Ingredients You’ll Need
Believe it or not, every ingredient here works like magic to give this Butterfinger Bundt Cake its craveable, over-the-top flair. Stock your pantry and get ready to transform simple baking staples into a cake to remember!
- All-purpose flour: Lays the foundation for a sturdy yet tender crumb that supports all the candy and chips.
- Baking powder: Gives your cake a gentle lift, so it doesn’t feel heavy even with all those delicious mix-ins.
- Baking soda: Balances flavors and helps the sour cream do its magic for a super-soft texture.
- Salt: Just a pinch to amplify both the sweet and peanut butter flavors.
- Unsalted butter, softened: The creamy base for a rich, luxurious crumb in every bite.
- Granulated sugar: Sweetens the deal and keeps your cake moist.
- Eggs: Four large beauties bind the batter while ensuring the cake bakes up moist and fluffy.
- Sour cream (or Greek yogurt): The secret to a super-moist, tangy cake people can’t stop talking about.
- Whole milk: Adds luscious richness and the perfect texture.
- Vanilla extract: A must for warmth and depth—don’t skip it!
- Crushed Butterfinger candy bars: The star mix-in for crunch, flavor, and loads of nostalgia (plus extra for topping!).
- Peanut butter chips: Add pockets of creamy, peanutty goodness all the way through.
- Milk chocolate chips: For classic chocolate bursts in every slice.
- Powdered sugar: The backbone of that dreamy, pourable glaze.
- Heavy cream (or milk): Whisks the glaze into a perfectly smooth drizzle.
- Creamy peanut butter: Infuses the glaze with nutty richness that pairs so well with Butterfingers.
- Extra chocolate chips (optional): Sprinkle on top for a decadent finish—go ahead, you deserve it!
How to Make Butterfinger Bundt Cake
Step 1: Prep Your Pan and Oven
First thing: preheat your oven to 350°F (175°C). Grease and flour your Bundt pan really well, making sure every nook and cranny is coated. A properly prepped pan ensures your Butterfinger Bundt Cake pops out perfectly shaped and stunning every time.
Step 2: Mix the Dry Ingredients
In a medium bowl, whisk together your all-purpose flour, baking powder, baking soda, and salt. This simple step means all those leaveners and salt are evenly distributed, giving your cake the perfect rise and balanced flavor throughout.
Step 3: Cream the Butter and Sugar
In a large bowl with a hand mixer or stand mixer, beat together the softened butter and granulated sugar until it’s pale, fluffy, and almost cloud-like. This step sets the stage for a cake that’s light but deeply flavorful.
Step 4: Add Eggs and Vanilla
Next, add your eggs one at a time, mixing well after each. Pour in the vanilla extract and mix again. The eggs create structure, while the vanilla harmonizes the sweet and nutty notes in your Butterfinger Bundt Cake.
Step 5: Alternate the Wet and Dry
On low speed, mix in the sour cream until incorporated. Gradually add your dry ingredient mixture in thirds, alternating with additions of milk, and begin and end with the dry mixture. This gentle alternation keeps the batter smooth and your finished cake ultra-tender.
Step 6: Fold in the Goodies
Using a spatula, gently fold in the crushed Butterfinger bars, peanut butter chips, and milk chocolate chips. Try not to overmix—just enough so every bite is loaded with candy-bar magic.
Step 7: Bake
Pour the batter into your prepared Bundt pan and smooth out the top. Bake for 55 to 65 minutes, or until a toothpick inserted into the center comes out with just a few moist crumbs (but not wet batter). Let your Butterfinger Bundt Cake cool in the pan for 15 minutes, then carefully invert onto a wire rack to finish cooling completely.
Step 8: Make the Peanut Butter Glaze
Whisk together the powdered sugar, creamy peanut butter, vanilla, and heavy cream (or milk) until smooth and pourable. Adjust with extra cream/milk until you get a velvety consistency that drips slowly off a spoon.
Step 9: Glaze and Finish
Once your cake has fully cooled, drizzle the peanut butter glaze generously all over the top. Finish by sprinkling the remaining crushed Butterfinger bars and, if you wish, extra chocolate chips. This is where your Butterfinger Bundt Cake transforms from gorgeous to absolutely irresistible!
How to Serve Butterfinger Bundt Cake

Garnishes
The best way to finish off this cake? Generous handfuls of extra crushed Butterfinger, a scatter of peanut butter chips, and a secret agent move: a pinch of sea salt or a dusting of powdered sugar right before serving! Each sprinkle highlights the buttery, nutty sweetness already in your Butterfinger Bundt Cake.
Side Dishes
This cake is pretty spectacular solo, but if you want to serve it with something extra, think of a scoop of vanilla ice cream, a dollop of whipped cream, or even fresh-sliced bananas. These sides brighten up every slice and play so well with all that chocolatey, peanutty goodness.
Creative Ways to Present
If you’re looking to turn Butterfinger Bundt Cake into the ultimate dessert centerpiece, slice it at the table for dramatic effect or use mini Bundt pans for adorable individual servings. You can even layer slices with extra whipped cream and more candy in parfait glasses for a creative twist!
Make Ahead and Storage
Storing Leftovers
Trust me, Butterfinger Bundt Cake keeps astonishingly well. Store any leftover cake covered tightly at room temperature for up to 3 days, or in the fridge for up to 5 days. The glaze helps keep everything moist, even after it sits!
Freezing
If you’d like to freeze the cake, wrap it (preferably without glaze and toppings) in a double layer of plastic wrap and foil. It’ll stay fresh for up to 2 months. When you’re ready to enjoy, thaw overnight at room temperature and glaze as usual.
Reheating
To enjoy a fresh-from-the-oven feel, warm individual slices for 10-20 seconds in the microwave. The glaze gets slightly gooey and the Butterfinger bits become extra melty—pure heaven in every bite.
FAQs
Can I use Greek yogurt instead of sour cream?
Absolutely! Full-fat Greek yogurt is a perfect stand-in for sour cream in this Butterfinger Bundt Cake, offering the same moisture and tender texture. Just make sure it’s unsweetened and unflavored for best results.
How can I keep my Bundt cake from sticking to the pan?
Greasing and flouring every curve and cranny of your Bundt pan is key. You can also use a baking spray with flour for extra insurance—the last thing you want is to lose all those gorgeous edges to sticking!
Can I make this recipe gluten-free?
Yes, you can swap in a good-quality, cup-for-cup gluten-free flour blend. Just double-check that your Butterfinger candies and chips are gluten-free too for a totally celiac-friendly treat!
What’s the best way to crush Butterfingers?
Place your Butterfinger candy bars in a zip-top bag and tap them gently with a rolling pin or meat mallet. You want mostly small pieces with a few bigger chunks for great texture in your cake and topping.
Can I leave out the peanut butter chips or chocolate chips?
Certainly! If you prefer a simpler flavor or want to spotlight the Butterfinger, just leave them out. You can increase the crushed Butterfinger by a quarter cup for extra crunch if desired.
Final Thoughts
I can’t tell you how many smiles this Butterfinger Bundt Cake has brought to my kitchen—every time I bake it, there’s a chorus of “wow, what’s in this?” If you want a memorable, joy-filled dessert that’s easy enough for weeknights but showy enough for celebrations, this is the one. Go ahead and give it a try—you and your lucky taste-testers won’t regret it!

