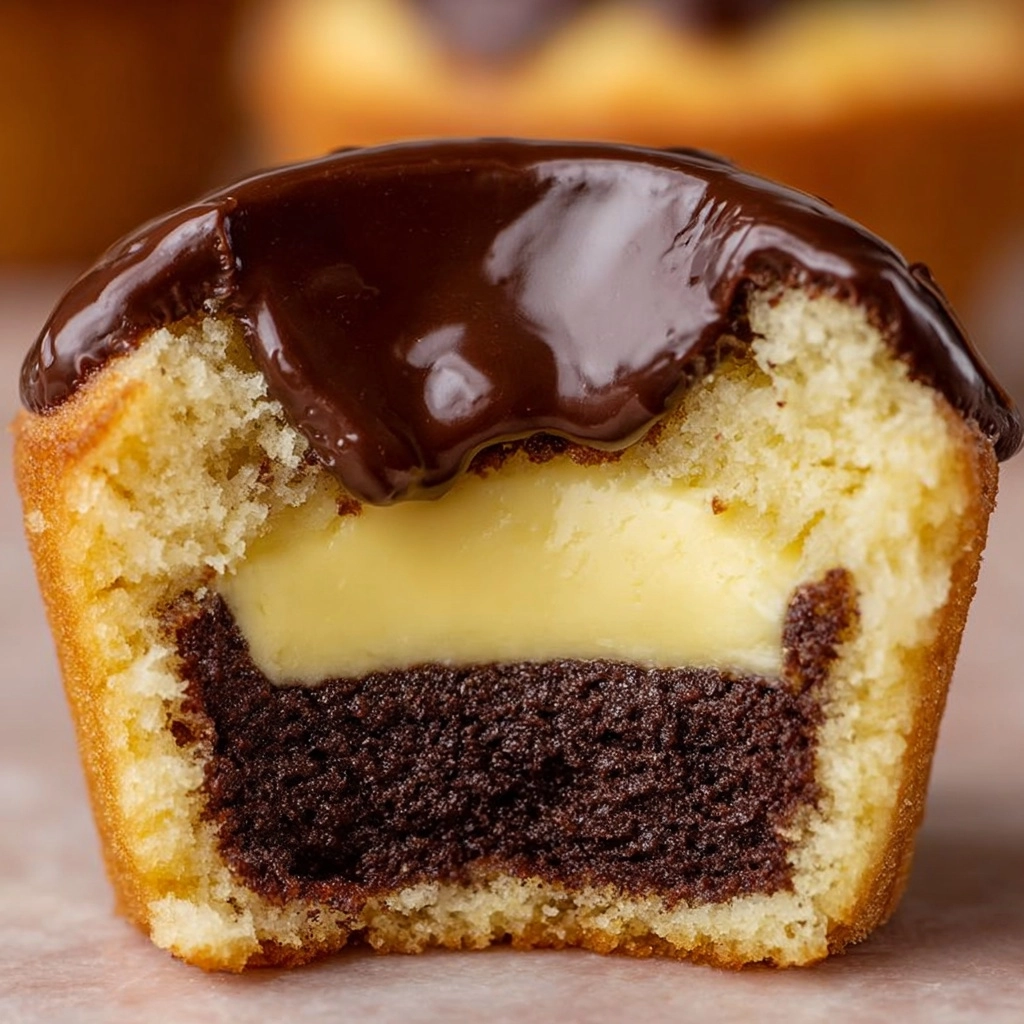
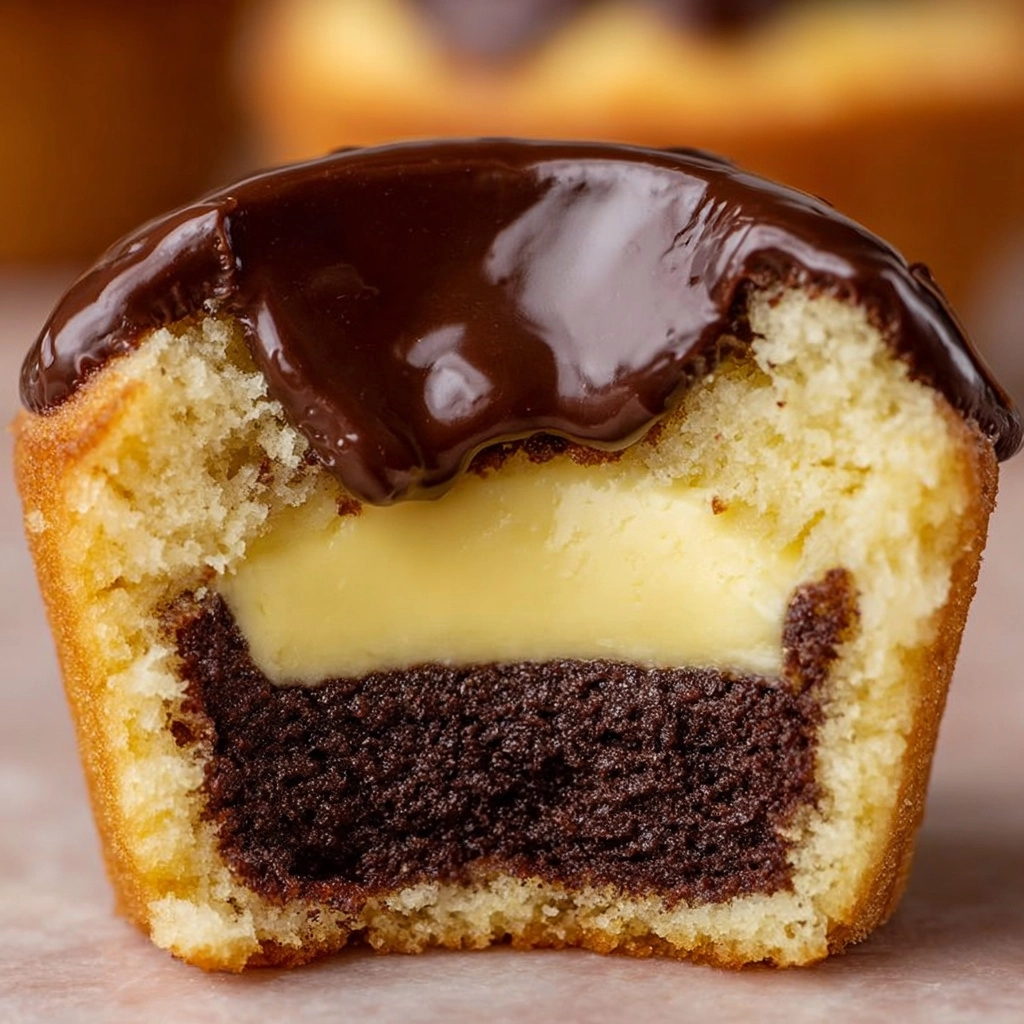
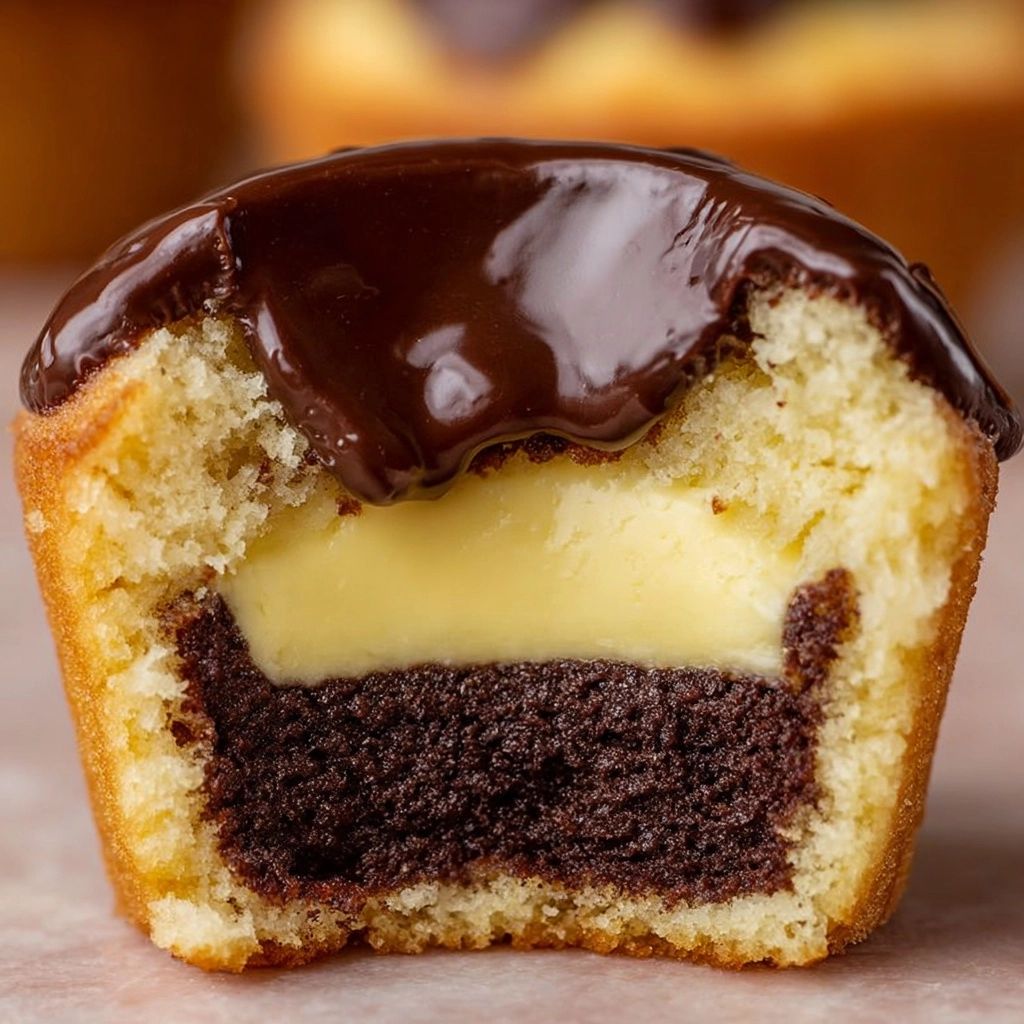
If you’re searching for a dessert that’s elegant, nostalgic, and just downright delightful, Boston Cream Pie Cupcakes are about to become your next obsession. Imagine bite-sized versions of the classic cake, featuring a fluffy vanilla cupcake, a silky-smooth vanilla custard center, and a luxurious chocolate ganache topping. Each cupcake is a perfect harmony of creaminess, richness, and light sponge—the kind of treat that feels special enough for celebrations but is easy enough to whip up on a whim.

Ingredients You’ll Need
Everything you need for these Boston Cream Pie Cupcakes is probably already in your kitchen, but each ingredient is chosen for the crucial role it plays. From the delicate crumb of the cupcake base to the velvety custard and decadent ganache, don’t skip a thing—each one adds to the irresistible appeal!
- All-purpose flour: Provides structure and a tender crumb for the cupcakes.
- Baking powder: Ensures a light, fluffy rise every time.
- Salt: Enhances all the sweet flavors, making everything pop.
- Unsalted butter: Adds richness and that classic homemade taste in both cupcakes and fillings.
- Granulated sugar: Sweetens and helps with a moist, tender texture in the sponge and custard.
- Large eggs: Give the cupcakes structure and contribute to the creamy custard filling.
- Vanilla extract: Delivers that signature vanilla warmth in each component.
- Whole milk: Infuses moisture and a touch of richness into both the batter and the custard.
- Cornstarch: Thickens the custard seamlessly for that perfectly creamy bite.
- Heavy cream: Ensures a shiny, silky texture in the ganache topping.
- Semi-sweet chocolate: Lends deep, chocolatey elegance to your ganache.
- Butter (for ganache): Adds that final shine and smoothness to the chocolate glaze.
How to Make Boston Cream Pie Cupcakes
Step 1: Prepare and Preheat
Start by cranking up your oven to 350°F (175°C) and line a 12-cup muffin tin with paper liners. This is your stage for creating the sweetest little Boston Cream Pie Cupcakes! Getting this set while you gather ingredients sets you up for baking success.
Step 2: Whip Up the Cupcake Batter
Whisk together your flour, baking powder, and salt in a medium bowl—these base ingredients are key for that light texture. In another bowl, beat the butter and sugar until fluffy and pale. Add the eggs, one at a time, mixing well after each addition, then blend in the vanilla extract. Now, alternate adding the dry ingredients and milk, starting and finishing with dry, mixing until just combined. Don’t overdo it; you want a tender cupcake!
Step 3: Bake the Cupcakes
Spoon your batter into the liners, filling each about two-thirds of the way up. Slide the tray into the oven and bake for 18 to 20 minutes, or until a toothpick poked in the center comes out clean. Cool completely on a wire rack—patience is key so your custard won’t melt when you fill them!
Step 4: Make the Vanilla Custard Filling
While your cupcakes cool, whisk the egg yolks, sugar, and cornstarch in a saucepan. Gradually add the milk, whisking constantly to keep the custard silky. Cook over medium heat, stirring the whole time, until things thicken up (about 5–7 minutes). Pull from the heat, then stir in the butter and vanilla for that hit of decadence. Press plastic wrap directly on the surface of the custard and chill to keep it ultra smooth and prevent skin from forming.
Step 5: Fill the Cupcakes
Once your cakes are cool and your custard is chilled, use a sharp knife or apple corer to carefully remove a small plug from the center of each cupcake. Gently spoon or pipe your dreamy vanilla custard into the middle, letting it peek out just a little for a tease of what’s inside.
Step 6: Make the Chocolate Ganache
Heat the heavy cream until it’s just simmering, then pour it over the chopped chocolate and butter in a bowl. Let everything sit for two minutes, then stir until you have a glossy, smooth ganache that feels almost too luxurious for a simple cupcake.
Step 7: Glaze with Ganache
This is where your Boston Cream Pie Cupcakes really reach showstopper status! Gently dip the top of each cupcake into the ganache, letting any excess drip off before you set them aside. Give the chocolate a few minutes to firm up slightly, so you get that perfect, snappy topping.
Step 8: Chill and Enjoy!
Pop the cupcakes into the fridge for 20 to 30 minutes to let the custard and ganache set. After that, it’s showtime—grab a cupcake and savor every decadent, creamy, chocolaty bite.
How to Serve Boston Cream Pie Cupcakes

Garnishes
Sprinkle a shower of chocolate curls or a dusting of powdered sugar over your Boston Cream Pie Cupcakes for a bakery-worthy finish. Sometimes, a little drizzle of caramel or a twist of orange zest makes the chocolate ganache even more irresistible!
Side Dishes
These cupcakes are beautiful as a standalone treat, but they pair happily with fresh berries, a scoop of homemade vanilla ice cream, or even a frothy cappuccino. The freshness of fruit helps balance the cupcake’s richness for a truly well-rounded dessert plate.
Creative Ways to Present
For parties, nestle each cupcake into a mini cupcake wrapper or display them on a tiered dessert stand. If you’re going for a wow-factor, serve the Boston Cream Pie Cupcakes in decorative cupcake boxes as sweet take-home favors. You can even top each one with tiny chocolate disks to mimic the classic cake design!
Make Ahead and Storage
Storing Leftovers
Place any leftover Boston Cream Pie Cupcakes in an airtight container and keep them in the refrigerator. They’ll stay fresh and luscious for up to three days. The custard center actually gets a bit firmer and more decadent as it sits!
Freezing
To freeze, set the filled (but unglazed) cupcakes in a single layer and freeze until solid. Wrap tightly and freeze for up to two months. When ready to indulge, thaw at room temperature for about two hours and glaze with chocolate ganache just before serving for the freshest taste and shine.
Reheating
You won’t need to actually reheat these cupcakes, but if you prefer them a little closer to room temperature, allow them to sit out for 15 minutes before enjoying. The ganache will soften, and the custard will taste extra creamy.
FAQs
Can I use store-bought custard for Boston Cream Pie Cupcakes?
Absolutely! If you’re short on time, a good quality store-bought vanilla pudding or custard will do, though making it from scratch lends a richer, more authentic flavor.
Can the cupcakes be made gluten-free?
Yes, simply swap the all-purpose flour for your favorite gluten-free blend (one with xanthan gum added is best). Check that your other ingredients are certified gluten-free, and you’ll still get that lovely texture.
What’s the best way to fill the cupcakes?
A piping bag fitted with a round tip makes filling neat and easy, but a small spoon and a steady hand work just as well. The key is to not overfill, so the custard doesn’t ooze out when topped with ganache!
How do I prevent runny custard?
Make sure your custard cooks until it’s thick enough to coat the back of a spoon, and chill it thoroughly before using. Cornstarch is the magic ingredient here—don’t skimp!
Can I double the recipe for a party?
Definitely! This recipe scales beautifully. Double all the ingredients and bake in batches so every guest gets to experience the joy of these Boston Cream Pie Cupcakes.
Final Thoughts
I can’t recommend these Boston Cream Pie Cupcakes enough; they’re proof that good things really do come in small packages. Whether you’re baking for a crowd or just a cozy family treat, these cupcakes deliver smiles with every bite. Grab your whisk, round up those ingredients, and let yourself be dazzled by this classic made modern—you’ll be hooked the moment you taste that gooey, creamy center under a shiny chocolate cap!

