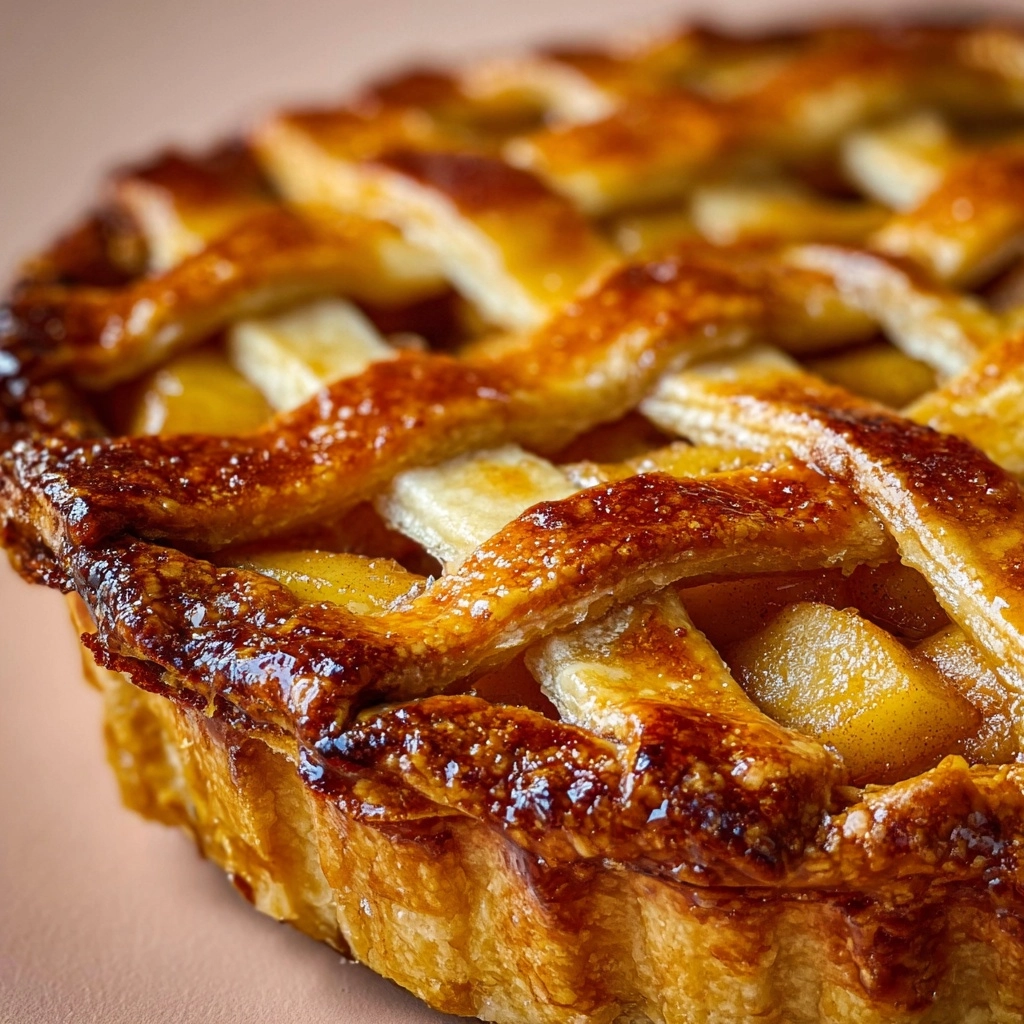
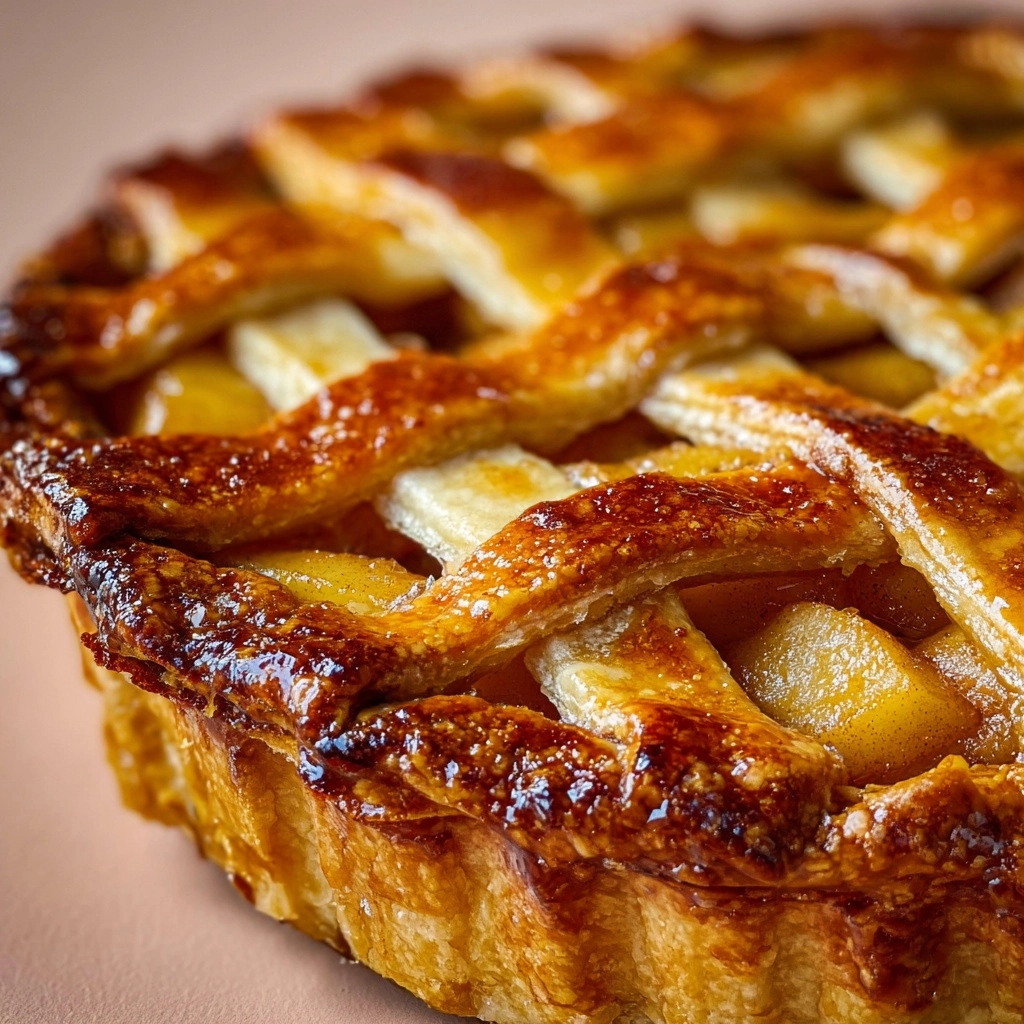
If you’ve ever wished for a dessert that wraps you up in cozy nostalgia with every bite, look no further than Classic Apple Pie. This sweet, comforting favorite is cherished across generations for good reason: the buttery, golden crust shatters delicately over a luscious filling of spiced apples, all melding together into pure, joyful harmony. Whether you’re baking for a family gathering, holiday party, or simply to fill your kitchen with the scent of cinnamon and apples, this Classic Apple Pie is a slice of happiness you’ll want to share again and again.

Ingredients You’ll Need
There’s something magical about the way simple, time-honored ingredients come together to make Classic Apple Pie. Each one is essential—playing a role in taste, texture, or color—so gather these with care. The freshness of your apples, the chill of your butter, and even a sprinkle of spice all matter in creating that iconic, irresistible result.
- All-purpose flour (2½ cups): This forms the base of your crust, providing structure and a tender bite.
- Salt (1 tsp): Just a pinch to enhance all the flavors without making the pie taste salty.
- Unsalted butter, chilled and cubed (1 cup): Essential for that dreamy, flaky pastry—keep it cold right up to mixing for best results.
- Ice water (6 to 8 tbsp): Helps bring the dough together while keeping the butter cold, ensuring extra flakiness.
- Apples, thinly sliced and peeled (6 cups): Choose a mix of tart and sweet varieties for complex flavor and gorgeous texture.
- Granulated sugar (¾ cup): Balances out the tartness in your apples and boosts caramelization.
- All-purpose flour (2 tbsp): Thickens the filling just enough so it’s never runny, always luscious.
- Ground cinnamon (1 tsp): The classic spice pairing, lending warmth and fragrance that makes apple pie unmistakable.
- Ground nutmeg (¼ tsp): A subtle nudge that deepens the overall spice profile.
- Lemon juice (1 tbsp): Adds brightness, awakens flavors, and helps prevent the apples from browning.
- Butter, cut into small pieces (1 tbsp): Melts into the filling and makes it rich and glossy.
- Egg yolk (1): When brushed on top, this helps achieve a beautifully bronzed crust.
- Milk (1 tbsp): Combined with the egg yolk for a perfect golden sheen after baking.
How to Make Classic Apple Pie
Step 1: Prepare the Pie Dough
Start out by making your pie crust—the true foundation of every Classic Apple Pie. In a large mixing bowl, combine the flour and salt, whisking lightly. Add the cold, cubed butter and use a pastry cutter, two forks, or even your fingers, working quickly, until the mixture resembles coarse, buttery crumbs. Carefully stir in ice water, just a tablespoon at a time, until you can gently press the dough together without it crumbling. Divide your dough in half, shape into two disks, and wrap each snugly in plastic wrap. Let them chill in the fridge for at least one hour; this crucial rest helps keep the butter solid and ensures the crust bakes up impossibly flaky.
Step 2: Preheat and Prepare the Filling
While your dough chills, preheat the oven to 425°F (220°C). Meanwhile, peel, core, and thinly slice your apples—a mix of tart and sweet apples gives the best flavor. Toss the slices in a large bowl with sugar, flour, cinnamon, nutmeg, and lemon juice, stirring gently so every piece is coated. The flour will catch the juices released as the pie bakes, creating a rich, slightly thickened syrup inside the crust.
Step 3: Roll Out the Bottom Crust
On a lightly floured surface, roll out one of your dough disks to a circle about 12 inches across. Carefully lift it into your 9-inch pie plate, letting the extra dough drape slightly over the edges. Don’t worry if it’s not perfect—the rustic, homemade look is part of the charm! Lightly press the dough into the plate and ease it up the sides.
Step 4: Fill and Dot with Butter
Spoon your apple filling evenly into the crust, making sure to layer the apples so there aren’t big air gaps. Dot bits of butter over the top of the apple mixture—this little trick melts during baking and adds unmatched richness and sheen to your filling.
Step 5: Add the Top Crust and Seal
Roll out your second dough disk to another 12-inch circle and gently place it over the apples. Trim the edges of both doughs so there’s about a half-inch overhang. Seal the edges by pinching them together, then flute or crimp for a beautiful, homemade finish. Cut small slits in the top crust to vent steam, which helps the filling cook down perfectly.
Step 6: Brush with Egg Wash and Bake
Beat the egg yolk with a tablespoon of milk and brush this golden mixture all over the top crust. This step is what gives your Classic Apple Pie that irresistible, shiny finish! Pop the pie into your preheated oven and bake for 15 minutes. Then, reduce the temperature to 350°F (175°C) and continue baking for 35 to 45 more minutes, until the crust is richly golden and the apple filling is bubbling through the slits.
Step 7: Cool and Serve
The hardest part of all: let the pie cool for at least 2 hours before cutting in. This patience pays off, allowing the filling to set and the flavors to meld. Now you’re ready to serve up a slice (or two!) of pure delight.
How to Serve Classic Apple Pie

Garnishes
When it comes to finishing touches, a scoop of creamy vanilla ice cream melting over a warm slice of Classic Apple Pie is impossible to resist. You can also sprinkle a dusting of powdered sugar or cinnamon on top for extra flair, or add a drizzle of salted caramel for an indulgent treat. Freshly grated lemon zest or a handful of toasted nuts make for beautiful, aromatic garnishes as well.
Side Dishes
Apple pie shines as the star dessert, but it’s wonderful alongside other simple accompaniments. Spoon up some freshly whipped cream, or set out a platter of sharp cheddar cheese—a surprisingly great match to the pie’s sweet-tart filling. For holiday spreads, pair your Classic Apple Pie with coffee, spiced chai, or a glass of dessert wine for a truly memorable experience.
Creative Ways to Present
If you want to shake things up, try serving your pie in unique shapes, like mini hand pies for parties or rustic galettes for a more casual feel. For an eye-catching twist, cut decorative vents or lattice patterns into the top crust. Arrange sliced apples in a spiral design under the crust for a hidden surprise—they’ll reveal themselves when you cut that first perfect wedge of Classic Apple Pie.
Make Ahead and Storage
Storing Leftovers
If you somehow have leftover Classic Apple Pie, store it at room temperature covered with foil for up to two days. If you need to keep it longer, refrigerate covered for up to four days; the filling may soften a bit over time but will keep all its flavor.
Freezing
Classic Apple Pie freezes beautifully, baked or unbaked. If freezing after baking, cool completely, wrap in plastic wrap and foil, and freeze for up to three months. If you want to freeze before baking, assemble the pie in a metal or disposable pie plate, wrap it up tightly, and freeze. When ready to bake, add a few extra minutes to the baking time without thawing—it will come out just as wonderful.
Reheating
Warm leftover pie in a 325°F (165°C) oven, loosely covered with foil to prevent excess browning, until it’s heated through (about 15–20 minutes). This helps revive the crust’s flakiness and makes the filling deliciously gooey again—just like it was fresh from the oven.
FAQs
What are the best apples to use for Classic Apple Pie?
A mix of tart and sweet apples works best. Granny Smiths provide tang and structure, while Honeycrisp, Fuji, or Golden Delicious offer sweetness and juiciness. Mixing types gives your pie both great flavor and texture.
Can I make the pie dough in advance?
Absolutely! You can prepare the pie dough up to three days in advance and keep it chilled in the fridge. If you want to make it even further ahead, wrap well and freeze it for up to a month. Thaw in the fridge overnight before using.
Why is it important to let the pie cool before serving?
Letting Classic Apple Pie cool gives the filling time to set, so your slices hold together beautifully and you get that perfect balance of crust and fruit in every bite. Cutting too soon can lead to a runny filling.
Is it necessary to use an egg wash on the crust?
While not strictly necessary, brushing the top with an egg yolk and milk mixture gives your pie a gorgeous color and shine. It also helps sugar or other toppings stick if you want to add a sparkling finish.
Can I use store-bought pie crust for Classic Apple Pie?
Absolutely—if you’re short on time or looking for convenience, store-bought crust works fine. You’ll still enjoy all the classic flavors in your apple pie, but the homemade crust truly takes it to another level.
Final Thoughts
Few desserts are as satisfying or heartfelt as a homemade Classic Apple Pie. With its irresistible aroma, tender apples, and shatteringly crisp crust, it’s a recipe you’ll look forward to making and sharing again and again. Give it a try, and let this timeless favorite bring warmth and joy to your table!

