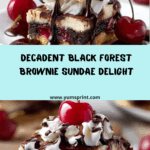
If you’re looking for the ultimate show-stopper dessert, the Black Forest Brownie Sundae Stack is here to make your sweet dreams come true. This treat combines rich, fudgy brownies studded with juicy cherries, pillowy whipped cream, and drizzles of decadent chocolate—all stacked invitingly for a truly unforgettable bite. It’s nostalgic, indulgent, and is guaranteed to steal the spotlight at any dinner or celebration. You’ll love how every forkful brings together that iconic Black Forest flavor, all wrapped up in an easy-to-make sundae stack.

Ingredients You’ll Need
You’ll be amazed at how a handful of simple, everyday ingredients can come together to create something so spectacular. Each component adds a special touch—whether it’s the melt-in-your-mouth chocolate, the punch of sweet-tart cherries, or the creamy whipped topper—that truly sets the Black Forest Brownie Sundae Stack apart.
- Unsalted butter: Provides richness and moisture, giving the brownies their signature fudgy texture.
- Dark chocolate, chopped: The foundation of these brownies; use a good-quality, 70% cocoa for intense chocolate depth.
- Sugar: Balances the bittersweet chocolate and helps create that lovely chewy top.
- Large eggs: Bind the batter together and add a gorgeous richness.
- Vanilla extract: A hint of warmth and extra aroma lifts the chocolate flavors.
- All-purpose flour: Just enough to hold the brownies together without making them cakey.
- Cocoa powder: Intensifies the chocolate punch and deepens the color.
- Pinch of salt: Essential for balance—it brings out all the other flavors.
- Fresh or jarred cherries (pitted & halved): Juicy bursts of sweetness that give you that true Black Forest vibe.
- Whipped cream: Makes each bite cloud-soft and irresistible.
- Fresh cherries (with stems): Perfect for a showy and classic sundae top.
- Chocolate syrup or ganache: For that gooey, glossy drizzle that ties everything together.
- Optional: shaved chocolate: Adds a pretty, professional flourish and a touch of extra decadence.
How to Make Black Forest Brownie Sundae Stack
Step 1: Prep Your Pan and Oven
Start by preheating your oven to 350°F (175°C) and lining an 8×8 inch baking pan with parchment paper. This ensures your brownies lift out easily later—no sticking, no fuss. A little extra effort here saves heartache when you’re ready to stack!
Step 2: Melt the Chocolate and Butter
In a heatproof bowl over simmering water, or gently in the microwave, melt your butter with the chopped dark chocolate, stirring until it’s smooth and glossy. Let it cool slightly; this helps the eggs blend in without scrambling, guaranteeing a perfectly thick batter.
Step 3: Whisk in Sugar, Eggs, and Vanilla
Now whisk in the sugar while the mixture’s still warm—it’ll help dissolve those grains for a lovely sheen. Add eggs one at a time, whisking thoroughly after each, then stir in the vanilla. Take a moment to appreciate how glossy and thick your batter’s becoming!
Step 4: Fold in Dry Ingredients and Cherries
Gently sift in the flour, cocoa powder, and a pinch of salt. Fold until just combined—don’t overmix! Scatter in the halved cherries and fold again to distribute their juicy sweetness evenly for that signature Black Forest Brownie Sundae Stack character.
Step 5: Bake and Cool
Pour your luscious batter into the prepared pan, spreading it out evenly. Bake for 30 to 35 minutes, until the edges are set but the middle still looks a tiny bit fudgy. Cool completely in the pan; this is key for cutting neat, sturdy brownie squares that stack beautifully.
Step 6: Cut and Assemble the Stacks
Slice your brownies into even squares. Create your Black Forest Brownie Sundae Stack by setting a brownie square down, dollop generous whipped cream, then another brownie. Repeat, finishing with more whipped cream, a fresh cherry, and a drizzle of chocolate syrup or ganache. If you’re feeling extra, sprinkle over some shaved chocolate for a pretty flourish.
How to Serve Black Forest Brownie Sundae Stack

Garnishes
The magic’s in the details! Always crown your Black Forest Brownie Sundae Stack with a swirl of whipped cream and a glossy cherry perched on top. A drizzle of chocolate sauce is non-negotiable, but feel free to scatter a shower of shaved chocolate for that classic, celebratory look.
Side Dishes
This dessert is an event on its own, but a scoop of vanilla bean ice cream alongside each stack brings a lovely contrast. If you’re feeling a bit more adventurous, try pairing with a berry compote or a dollop of sour cherry jam to lean into those Black Forest flavors even more.
Creative Ways to Present
Make it party-ready by building individual mini stacks in clear glasses for a trifle effect, or layer the components in mason jars for an on-the-go treat. For dramatic flair, serve each stack on elegant plates with a fresh cherry and a sprinkle of edible gold dust at special occasions.
Make Ahead and Storage
Storing Leftovers
Store any leftover brownie squares in an airtight container at room temperature for up to three days, or refrigerate if your kitchen is warm. Keep the whipped cream and chocolate sauce separate, then assemble just before serving so everything stays fresh and luscious.
Freezing
Unadorned brownies freeze beautifully! Wrap squares tightly in plastic wrap, then place in a zip-top bag. They’ll freeze happily for up to 2 months. Defrost at room temperature before assembling your Black Forest Brownie Sundae Stack, and whip cream fresh so the texture stays perfect.
Reheating
To enjoy that just-baked warmth, pop brownie squares in the microwave for 5 to 10 seconds. Don’t overdo it—just enough to bring back the fudgy texture. Always add whipped cream and toppings after, so nothing melts before you get to enjoy your stack!
FAQs
Can I use frozen cherries?
Absolutely! Just thaw, drain, and pat the cherries dry to prevent any extra liquid from making your brownies soggy. Frozen cherries still add that classic burst of tart sweetness to every bite.
What’s the best way to slice brownies neatly for stacking?
Let brownies cool completely, then use a sharp knife or metal bench scraper. For super clean edges, dip your tool in hot water and wipe it dry before each slice—perfect squares every time!
Can I make this dessert gluten-free?
Yes! Simply swap the all-purpose flour for your favorite gluten-free blend. Make sure to check the chocolate and other ingredients for hidden gluten, and you’ll have a delicious gluten-free Black Forest Brownie Sundae Stack everyone can enjoy.
How far in advance can I assemble the stacks?
For freshest results, assemble just before serving—this keeps the whipped cream looking lovely and the brownies from going soggy. If you need to prep ahead, have all components ready and layer at the last minute.
Is there a non-dairy option for this recipe?
You can easily substitute plant-based butter, chocolate, and a non-dairy whipped cream alternative to make a vegan-friendly version. Just be sure your chocolate and toppings are labeled dairy-free for a completely vegan stack.
Final Thoughts
If you’re craving a dessert that’s striking, nostalgic, and guaranteed to delight a crowd, you absolutely have to try the Black Forest Brownie Sundae Stack! With each layer, you’ll discover new favorites—and your friends and family will be begging for seconds. Go on, make it your next sweet tradition!