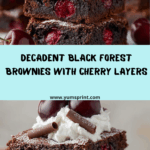
If you’re a fan of chocolate-cherry desserts, prepare to swoon over these Black Forest Brownies. Combining the deep, fudgy richness of brownies with a luscious cherry layer and pillowy clouds of whipped cream, this nostalgic treat puts a playful, irresistible twist on classic Black Forest flavors. Whether you’re baking for a special occasion or simply craving something decadent, these brownies make every bite feel like a celebration.

Ingredients You’ll Need
These Black Forest Brownies come together with a handful of pantry staples and just a few specialty additions. Each ingredient plays its own role in making the brownies extra chocolatey, chewy, and packed with juicy cherry flavor.
- Unsalted Butter: Rich butter is key for bold flavor and that perfectly dense brownie texture.
- Dark Chocolate (8 oz, chopped): Use a good-quality chocolate; it gives the brownies their irresistible depth and color.
- Granulated Sugar (1 ½ cups): Sweetens and helps create those shiny, crackly tops.
- Brown Sugar (½ cup): Adds a touch of caramel flavor and keeps the brownies extra moist.
- Large Eggs (4, room temperature): Bind the batter and allow it to bake up lush and fudgy.
- Vanilla Extract (1 tsp): Rounds out the chocolate with a soft, aromatic hint.
- All-Purpose Flour (1 cup): The sturdy base that holds up the layers without drying out the brownies.
- Unsweetened Cocoa Powder (½ cup): Intensifies the chocolate flavor for a double hit of decadence.
- Salt (½ tsp): Makes all the sweet flavors pop.
- Cherry Pie Filling (1 can, 21 oz): The starring fruity layer—store-bought or homemade both work beautifully.
- Kirsch (2 tbsp, optional): For a traditional Black Forest vibe with a subtle boozy warmth.
- Heavy Whipping Cream (1 ½ cups, cold): Whips up into a fluffy, dreamy topping.
- Powdered Sugar (¼ cup): Gently sweetens the whipped cream without grittiness.
- Vanilla Extract (1 tsp, for cream): Adds aromatic balance to the cream’s richness.
- Chocolate Shavings/Curls: For that fancy, classic Black Forest look—use a veggie peeler on a chocolate bar.
- Extra Cherries: Nothing says Black Forest like a bonus cherry or two on top!
How to Make Black Forest Brownies
Step 1: Prep Your Pan and Ingredients
Start by preheating your oven to 350°F (175°C). Line a 9×13-inch baking pan with parchment paper so the Black Forest Brownies lift out seamlessly after baking. Let your eggs come to room temperature for the best batter texture.
Step 2: Melt the Chocolate and Butter
In a heatproof bowl, melt the unsalted butter together with the chopped dark chocolate. You can do this in the microwave in 30-second bursts, stirring between each, or use a double boiler for gentle, even heat. Stir until you have a glossy, silky base.
Step 3: Whisk in Sugars and Eggs
Take the melted mixture off the heat. Whisk in granulated sugar and brown sugar until completely blended and slightly cooled. Then add the eggs, one at a time, mixing thoroughly after each addition. This phase makes your brownies dense and fudgy. Stir in the vanilla extract.
Step 4: Fold in Dry Ingredients
Sift together the all-purpose flour, cocoa powder, and salt, then fold the dry ingredients into your chocolate mixture gently. Stop as soon as there are no visible streaks of flour—overmixing leads to tough brownies!
Step 5: Build the Layers
Spread half of your brownie batter into the prepared pan, smoothing it out. Evenly spoon all that luscious cherry pie filling right over the first brownie layer, from edge to edge. If you love that signature Black Forest kick, drizzle kirsch over the cherries now.
Step 6: Top and Bake
Carefully cover the cherry layer with the remaining brownie batter. Use a spatula to gently nudge the batter right to the edges, sealing in the fruit. Slide the pan into the oven and bake for 35 to 40 minutes: you’re looking for set edges and a slightly soft, fudgy center.
Step 7: Cool Completely
Remove the pan from the oven and let your Black Forest Brownies cool right in the pan. This ensures the cherry layer firms up and the brownies slice neatly. Resist the urge to rush—cooling is key for those gorgeous layers.
Step 8: Make the Whipped Cream
With the brownies cool, whip the heavy cream, powdered sugar, and vanilla together until stiff peaks form. A cold bowl and whisk yield the fluffiest results. This whipped cream layer should hold its shape and taste dreamy.
Step 9: Assemble and Garnish
Dollop the whipped cream generously over the brownies and swirl into an even, pillowy blanket. Top with chocolate shavings or curls and a few extra cherries for the true Black Forest Brownies finishing touch.
Step 10: Chill and Slice
Pop the whole pan into the fridge for at least 1 hour before slicing. This helps the layers set—making for clean, tempting squares that show off all that chocolate and cherry goodness when you serve.
How to Serve Black Forest Brownies

Garnishes
For Black Forest Brownies that really wow, pile on the chocolate shavings or curls— they melt luxuriously on your tongue and look stunning. Be generous with extra cherries on top, which give every slice a flash of color and unmistakable fruity flair.
Side Dishes
These brownies stand tall all on their own, but if you want to balance the richness, serve them alongside tangy fresh berries or a small scoop of vanilla ice cream. A mug of strong coffee or a creamy liqueur also goes perfectly with their classic chocolate-cherry combo.
Creative Ways to Present
Try cutting your Black Forest Brownies into small squares for a decadent bite-sized dessert bar, stack them artfully for high tea, or serve as a crown jewel on a dessert platter with a drizzle of warm chocolate sauce. Individual parfait glasses with cubes of brownie, cherries, and cream also make for an eye-catching, modern twist!
Make Ahead and Storage
Storing Leftovers
Leftover Black Forest Brownies keep beautifully in the fridge. Simply cover the pan tightly with foil or plastic wrap, or transfer squares to an airtight container. They’ll stay fresh and moist for up to 3 days; the cherry and whipped cream layers meld into the brownies for even more flavor.
Freezing
You can freeze the brownie (without the whipped cream layer) for up to 2 months. Wrap tightly in plastic wrap then foil, and thaw overnight in the refrigerator before adding cream and garnishes. Freezing with whipped cream isn’t recommended, as the texture softens.
Reheating
If you love your brownies a little warm (and who doesn’t?), microwave individual slices (without whipped cream) for 10–15 seconds. This makes the chocolate extra fudgy. For leftovers topped with cream, enjoy them cold straight from the fridge.
FAQs
Can I use fresh cherries instead of pie filling?
Absolutely! Fresh cherries simmered with a bit of sugar until syrupy make a wonderful homemade alternative to canned pie filling. Just be sure to let them cool before layering into the brownies.
Do I have to use kirsch?
Not at all—it’s optional. Kirsch gives the brownies that classic Black Forest flavor, but you can skip it if serving kids or if you prefer, or use a splash of cherry juice for extra fruitiness.
Can I make these Black Forest Brownies gluten-free?
Yes! Swap the all-purpose flour for your favorite 1-to-1 gluten-free flour blend. Double-check the rest of your ingredient labels to ensure everything’s gluten-free.
How do I get clean, neat layers when slicing?
Chill your Black Forest Brownies for at least an hour and use a sharp, thin knife wiped clean between each cut. This helps keep the cherry and cream layers tidy for picture-perfect squares.
Can I prepare the whipped cream ahead of time?
You can whip the cream a few hours in advance and keep it chilled. For best results, assemble and garnish the brownies just before serving so the topping stays fluffy and fresh.
Final Thoughts
If you’re a chocolate-and-cherry fan, these Black Forest Brownies are a must-try—intense, fudgy, and so delightfully festive. Whether it’s for a holiday table or an everyday treat, you’ll find yourself coming back to this recipe again and again. Happy baking!