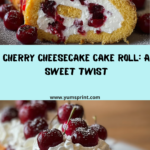
Cherry Cheesecake Cake Roll is the ultimate show-stopper for any dessert table. Imagine all the blissful flavors of creamy cheesecake, sweet cherries, and a tender sponge cake rolled together into irresistible, swirled slices—it’s a slice of pure joy you’ll want to share with everyone you know. Whether you’re baking for a family gathering, a special celebration, or simply to treat yourself, this Cherry Cheesecake Cake Roll transforms just a handful of simple ingredients into a memorable, stunning dessert you’ll crave again and again.

Ingredients You’ll Need
Every element of this Cherry Cheesecake Cake Roll delivers a unique flavor note or luscious texture, and together, they create dessert magic. With simple but essential pantry ingredients, you’ll be amazed at how easy it is to whip up something so spectacular!
- Eggs: Beating the eggs creates a light, airy sponge for rolling—fresh eggs work best!
- Granulated sugar: Adds delicate sweetness and helps the cake develop a soft, golden crumb.
- Vegetable oil: Keeps the cake moist and easy to roll without cracking.
- Almond extract: Brings a beautifully aromatic, subtle flavor that pairs perfectly with cherries and cream cheese.
- All-purpose flour: The backbone of the sponge, providing structure while staying tender.
- Baking powder: Ensures your cake has just the right lift and softness.
- Salt: A tiny pinch magnifies every sweet and tangy flavor—don’t skip it!
- Powdered sugar (for dusting): Keeps the cake from sticking and adds a pretty finish.
- Cream cheese: The star of the filling, creating that signature creamy, tangy cheesecake layer.
- Powdered sugar (for filling): Sweetens the cheesecake filling without making it grainy.
- Vanilla extract: Brings warmth and depth to the cheesecake layer.
- Cherry pie filling: Bright, glossy, and full of juicy cherry flavor—this is what gives the cake its classic cherry cheesecake flair!
How to Make Cherry Cheesecake Cake Roll
Step 1: Prep the Pan and Preheat
Start things off strong by preheating your oven to 350°F (175°C). Take a 15×10-inch jelly roll pan, line it with parchment paper, and give it a quick, light grease to guarantee easy cake removal later.
Step 2: Whip Up the Cake Batter
In a large bowl, grab your electric mixer and beat together the eggs and granulated sugar on high for about 5 minutes. You want the mix to be super thick and pale—this part is key for that classic sponge texture. Next, blend in your vegetable oil and almond extract until smooth. In a separate bowl, whisk together the flour, baking powder, and salt. Gently fold these dry ingredients into your wet mixture, just until everything is combined—be careful not to overmix, or you’ll lose that lovely fluffiness!
Step 3: Bake the Cake
Pour the batter into your prepared pan, spreading it out evenly. Slide it into the oven and bake for 12–15 minutes, or until golden and set—a toothpick poked into the center should come out clean. While it bakes, dust a clean kitchen towel with powdered sugar to prevent sticking during the rolling process.
Step 4: Roll the Cake (While Warm!)
Once out of the oven, immediately invert the hot cake onto your powdered-sugar-dusted towel. Peel off the parchment paper gently. Start at one short side and roll up the cake in the towel. Let it cool completely while wrapped up—this crucial step keeps the cake soft and flexible for rolling later.
Step 5: Make the Cheesecake Filling
While the cake is cooling, beat the softened cream cheese, powdered sugar, and vanilla extract together until the mixture is silky smooth and creamy. This will be the luscious cheesecake ribbon that runs through your Cherry Cheesecake Cake Roll.
Step 6: Assemble the Cake Roll
Carefully unroll your completely cooled cake. Spread the cheesecake filling over the entire surface in an even layer. Next, spoon the cherry pie filling on top, scattering those juicy cherries evenly from end to end.
Step 7: Roll and Finish
With steady hands (and a little excitement!), gently re-roll the cake, this time without the towel. Place your finished roll seam-side down on a serving platter for a picture-perfect finish. Dust the top generously with powdered sugar.
Step 8: Slice and Savor
Slice into beautiful rounds, revealing those signature swirls of cherry and cheesecake. Serve up your stunning Cherry Cheesecake Cake Roll and watch everyone’s eyes light up!
How to Serve Cherry Cheesecake Cake Roll

Garnishes
A light dusting of powdered sugar is truly all you need for a classic finish, but you can make your Cherry Cheesecake Cake Roll pop with extra garnishes! Try a dollop of whipped cream, a few extra cherries, or even thinly sliced toasted almonds for crunch. Edible flowers or fresh mint leaves add a fun, elegant flair if you want to really wow your guests.
Side Dishes
As rich and flavorful as this cake is, it pairs beautifully with simple sides. Coffee or espresso is a dreamy companion, while a scoop of vanilla or almond ice cream makes the whole dessert even more festive. For a lighter touch, serve with a fresh fruit salad or simple berries to contrast the cake’s decadence.
Creative Ways to Present
Put a personal spin on your presentation! Slice the cake roll into bite-sized pieces and arrange them on a tiered dessert tray for parties, or make a “deconstructed” trifle by layering slices with whipped cream and extra cherry filling in clear glasses. A drizzle of melted white chocolate across the top can take your Cherry Cheesecake Cake Roll from lovely to outright unforgettable.
Make Ahead and Storage
Storing Leftovers
Leftover Cherry Cheesecake Cake Roll is a treat all over again! Wrap slices or the whole roll tightly in plastic wrap and refrigerate. It’ll stay moist and delicious for up to three days, making it a great make-ahead dessert for busy weeks or gatherings.
Freezing
Want to prep even further in advance? Simply wrap the finished, unsliced cake roll in plastic wrap and then a layer of foil. Freeze for up to two months. When you’re ready, thaw overnight in the fridge, then slice and serve when the craving hits.
Reheating
There’s no need to reheat this dessert—Cherry Cheesecake Cake Roll is best enjoyed chilled or at room temperature. If you prefer it slightly warmer, allow slices to sit out for 15–20 minutes before serving so the creamy cheesecake filling softens just a bit.
FAQs
Can I use homemade cherry filling instead of canned?
Absolutely! If you have fresh cherries, simmer them with a bit of sugar and cornstarch to make a glossy homemade filling. The result is extra special and adds a personal touch to your Cherry Cheesecake Cake Roll.
My cake cracked a little when rolling—what went wrong?
Cracking usually happens if the cake cools too much before rolling or if it’s slightly overbaked. Rolling while still warm and being gentle are key. Don’t worry—powdered sugar, garnishes, or a strategic slice can help hide any minor cracks!
Can I make the Cherry Cheesecake Cake Roll gluten-free?
Yes, you can swap in your favorite 1:1 gluten-free flour blend. The texture may change slightly, but you’ll still have a gorgeous, tasty dessert everyone can enjoy.
Is it possible to use different fruit fillings?
Definitely! Blueberry, raspberry, or even lemon curd would all be delicious. Get creative and try seasonal jams or compotes to make each roll your own.
How do I get clean, neat slices?
For picture-perfect slices, use a sharp serrated knife and wipe it clean between each cut. Chilling the roll thoroughly before slicing also helps hold everything together beautifully.
Final Thoughts
If you’re searching for a dazzling yet approachable dessert, you can’t go wrong with Cherry Cheesecake Cake Roll. Every slice offers the perfect balance of light cake, luscious cheesecake, and tangy cherry goodness. Don’t wait for a holiday—make it this weekend, and watch it become a new favorite in your kitchen!