Recipe 1")
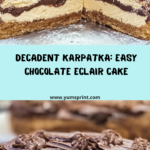
Chocolate Eclair Cake (Karpatka) is the kind of dessert that sparks immediate joy, as if the very first bite could transport you straight to a charming European café. With its pillowy choux pastry layers, rich vanilla custard filling, and glossy chocolate topping, this treat is pure celebration—a delectable Polish-French fusion that tastes like a labor of love, but is honestly a breeze to make at home. Every bite delivers a beautiful contrast of textures and flavors, making it impossible to have just one slice.
 Recipe 2")
Ingredients You’ll Need
The magic of Chocolate Eclair Cake (Karpatka) lies in the humble, everyday ingredients that, when put together, make something unforgettable. Each plays a crucial role, from the buttery pastry to the creamy filling and the velvety chocolate finish.
- All-purpose flour: The backbone of the choux pastry, giving structure and just the right chew.
- Unsalted butter: Richness and buttery flavor in both the base and the filling—essential!
- Water: Hydrates the flour and helps create the signature light pastry texture.
- Salt: Just a pinch brings out the flavors in both the dough and the custard.
- Large eggs: Eggs make the pastry rise and add gorgeous color and richness.
- Whole milk: The base for a luscious custard filling—don’t skimp, whole milk gives the creamiest results.
- Granulated sugar: Sweetens the custard without overpowering it, letting vanilla shine.
- Egg yolks: Make the filling silky, thick, and indulgent.
- Cornstarch: Ensures a thick, sliceable custard that holds up beautifully.
- Vanilla extract: Adds real warmth and depth to the cream filling—pure comfort.
- Dark chocolate: For a truly decadent topping, choose quality chocolate you’d eat on its own.
- Heavy cream: The secret to a glossy, pourable chocolate layer that sets just right.
How to Make Chocolate Eclair Cake (Karpatka)
Step 1: Prep the Pan
Start by preheating your oven to 375°F (190°C). Grab an 8×8-inch baking pan, grease it lightly, and line it with parchment paper. This makes it simple to lift out the finished cake (and keeps any custard drips under control).
Step 2: Make the Pastry Base
In a medium saucepan, combine water, unsalted butter, and salt. Bring the mixture to a gentle boil, making sure the butter is fully melted and incorporated. Stir in your flour all at once, then keep stirring until it pulls together into a smooth, glossy dough that pulls away from the pan.
Step 3: Add the Eggs
Remove the saucepan from heat and let the dough cool for a couple of minutes. Add the eggs one at a time, mixing thoroughly after each addition—this helps create that signature airy, pull-apart pastry. Don’t worry if it seems a bit gloopy at first; it will smooth out beautifully.
Step 4: Bake the First Layer
Spread half of your dough evenly into the bottom of your prepared pan. Place in the oven and bake for 20-25 minutes until the top is golden brown and puffed up. Remove and let this layer cool completely, which gives you time to get started on the creamy filling.
Step 5: Prepare the Vanilla Filling
In a clean saucepan, whisk together whole milk, granulated sugar, egg yolks, and cornstarch. Gently heat the mixture over medium, whisking constantly so it thickens without scrambling the eggs. Once it’s thick and glossy, take it off the heat and stir in the butter and vanilla extract. Let the filling cool to room temperature so it spreads easily later.
Step 6: Layer the Filling
Once your bottom pastry layer has cooled, spread the cooled vanilla filling evenly over it. The custard should be thick enough to mound up a bit, ensuring each bite is luxuriously creamy.
Step 7: Prepare and Bake the Top Pastry Layer
Roll out the remaining dough into an even layer. Bake this second layer in the oven for another 20-25 minutes, until golden and puffed. Allow it to cool completely—this helps keep the filling firm and the chocolate topping crisp once assembled.
Step 8: Assemble and Add Chocolate Topping
Place the cooled upper pastry gently over your vanilla filling. Next, melt the dark chocolate with the heavy cream in a heatproof bowl (either in the microwave or over a gently simmering pot of water). Stir until silky-smooth. Pour this glossy chocolate blanket over your cake, spreading it all the way to the edges.
Step 9: Chill and Slice
Let your Chocolate Eclair Cake (Karpatka) rest in the refrigerator for at least 2 hours to help everything set. This wait is hands-down the hardest part—but slicing into those perfect layers will be worth every minute!
How to Serve Chocolate Eclair Cake (Karpatka)
 Recipe 3")
Garnishes
For the ultimate finish, you can dust the top with a light snowfall of powdered sugar, add delicate curls of dark chocolate, or a sprinkle of toasted almond slivers. Fresh berries can also brighten up the plate and add a hint of tartness that balances the creamy richness.
Side Dishes
Chocolate Eclair Cake (Karpatka) pairs beautifully with a freshly brewed cup of coffee, black tea, or even an after-dinner espresso. For something a bit special, serve with a scoop of vanilla bean ice cream or a dollop of lightly whipped cream to echo the custardy filling inside.
Creative Ways to Present
For an eye-catching party presentation, slice the cake into small squares and serve each on individual dessert plates topped with a single raspberry or mint sprig. Alternatively, stack mini pieces on a tiered cake stand, letting those chocolate-drizzled layers steal the spotlight at any gathering.
Make Ahead and Storage
Storing Leftovers
Store any extra Chocolate Eclair Cake (Karpatka) in an airtight container in the refrigerator, where it will stay delightfully fresh and creamy for up to four days. The flavors continue to meld as it sits—some say the cake is even tastier on day two!
Freezing
If you want to save a few slices for a future treat, you can freeze Chocolate Eclair Cake (Karpatka). Wrap individual squares tightly in plastic wrap, then place in a freezer-safe container. It will keep well for up to a month. Just be aware the texture may be a tad softer upon thawing, especially the custard.
Reheating
Chocolate Eclair Cake (Karpatka) is designed to be enjoyed chill and creamy, straight from the fridge. It’s not recommended to reheat, as the pastry could lose its lightness and the custard may become runny. Instead, simply let frozen slices thaw in the refrigerator overnight before enjoying.
FAQs
Can I make Chocolate Eclair Cake (Karpatka) a day in advance?
Absolutely! In fact, letting the cake rest overnight helps the flavors develop and the custard firm up, so it slices perfectly. Just cover it well and keep it chilled until you’re ready to serve.
What’s the best chocolate to use for the topping?
Go for a dark chocolate with a cocoa content around 60 to 70 percent. It should be one you genuinely enjoy snacking on, as the flavor shines through. If you like it a bit sweeter, opt for semisweet chocolate instead.
Can I use store-bought vanilla pudding instead of making the custard?
It’s possible to use vanilla pudding in a pinch, but the homemade custard brings an extraordinary richness and depth that sets this Chocolate Eclair Cake (Karpatka) apart from shortcut versions.
How do I keep the pastry from deflating?
Make sure the pastry is baked until it’s golden and puffed with a crisp crust, and let it cool completely before assembling. This keeps your layers airy and your cake from becoming soggy.
Is it possible to make this recipe gluten free?
Yes, you can substitute a good-quality gluten free all-purpose flour blend for the traditional flour. The rest of the ingredients are naturally gluten free, so you’ll still get all the signature flavors and textures.
Final Thoughts
There’s a true sense of delight in sharing a slice of homemade Chocolate Eclair Cake (Karpatka) with friends or family. With every layer offering something irresistible, it’s a dessert that makes memories. I hope you’ll give it a try—your kitchen (and your lucky taste testers) will thank you!