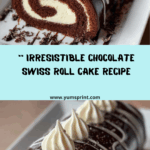
If you’re searching for a dessert that dazzles visually and tastes downright dreamy, this Chocolate Swiss Roll Cake is a showstopper that never disappoints. From its tender, chocolatey sponge to the silky cream spiraled within and the glossy ganache cloaking the outside, every slice feels like a celebration. Whether you’re sharing with friends, bringing it to a party, or treating yourself at home, this cake is easy enough for any baker yet impressive enough to steal the spotlight.

Ingredients You’ll Need
The magic of this Chocolate Swiss Roll Cake lies in a handful of simple, high-quality ingredients. Each one plays a starring role: from building that feather-light sponge to whipping up an irresistibly creamy filling and a finish that will have everyone reaching for seconds.
- Eggs: Provide lift and structure, ensuring the sponge is airy yet flexible enough to roll beautifully.
- Sugar: Sweetens the sponge and helps stabilize the beaten eggs for that classic soft crumb.
- Vanilla Extract: Infuses both the cake and filling with gentle warmth and depth.
- All-Purpose Flour: Delivers just the right amount of tenderness and structure for the rolled cake shape.
- Cocoa Powder: For a rich chocolate flavor and that deep, enticing color everyone loves.
- Baking Powder: Lends lightness so the cake remains fluffy, not dense.
- Salt: Balances out the sweetness and enhances chocolatey notes.
- Milk: Keeps the sponge moist and pliable, critical for rolling.
- Heavy Cream (for filling): Whips up luxuriously thick and stable, perfect for that dreamy swirl inside.
- Powdered Sugar: Dissolves smoothly into the cream, giving the perfect sweet touch.
- Dark Chocolate: Melts into a rich, glossy ganache that takes the whole cake over the top.
- Extra Heavy Cream (for ganache): Ensures the ganache is pourable and silky, ideal for a luscious finish.
How to Make Chocolate Swiss Roll Cake
Step 1: Prepare the Chocolate Sponge
Start by preheating your oven to 180°C (350°F) and lining a 10×15 inch baking tray with parchment paper. This creates the perfect nonstick base for your soft sponge. Get your eggs and sugar together in a bowl, then whisk them with an electric mixer until the mixture is fluffy and pale, about 5 to 6 minutes. This step is key because all that air creates a sponge that’s light enough to roll. Sift in the flour, cocoa powder, baking powder, and salt, folding gently so you don’t deflate those precious bubbles. Finally, stir in the milk and vanilla until just combined for a batter that holds the secret to your swirl.
Step 2: Bake and Roll the Sponge
Spread your silky batter evenly in the prepared tray, giving those corners a delicate touch. Bake for 10 to 12 minutes; watch closely because you want the sponge cooked through but still pliable. As soon as it’s out, invert it onto a clean kitchen towel dusted with powdered sugar—this keeps it from sticking and adds a little sweetness to the exterior. While it’s still warm, gently roll it up from the short end, towel and all. Let it cool in this rolled shape to prevent cracks later. You’ll be amazed how this step sets you up for a perfect spiral!
Step 3: Whip Up the Cream Filling
Time for that creamy heart. Grab your chilled heavy cream, powdered sugar, and vanilla extract, then whip them together until stiff peaks form. This only takes a few minutes but gives you a filling that’s lush and luxurious, sweet but not overpowering. Once your sponge has cooled, carefully unroll it and spread the whipped cream evenly across the surface, making sure to go right to the edges—every bite should have some of that dreamy filling!
Step 4: Roll and Fill Again
With the cream in place, gently re-roll your cake, this time without the towel. Take your time here; a bit of patience results in the perfect swirl. If some of the filling spills out, just tidy up the edges. Wrap the roll in plastic and chill it for an hour or so—this firms things up and makes slicing much easier (and prettier!).
Step 5: Make the Ganache and Decorate
For the crowning glory, heat the heavy cream until just steaming, then pour it over your chopped dark chocolate. Let it sit, then stir gently until you have a glossy, pourable ganache. Drizzle or pour this all over your roll, letting it drip down the sides for that irresistible, bakery-style look. If you’re feeling extra, pipe a flourish of whipped cream down the top. Your Chocolate Swiss Roll Cake is officially ready for its close-up!
How to Serve Chocolate Swiss Roll Cake

Garnishes
Amp up the drama by showering your Chocolate Swiss Roll Cake with chocolate shavings, a sprinkle of cocoa powder, or a dusting of powdered sugar. Fresh berries perched on top or a touch of edible gold leaf add a hint of luxury and contrast beautifully with the dark chocolate ganache.
Side Dishes
To balance the richness of your cake, serve it alongside a scoop of vanilla bean ice cream or a handful of tart raspberries. A cup of piping hot espresso or a chilled glass of milk is also the perfect classic pairing, cutting the sweetness and highlighting the deep cocoa flavor.
Creative Ways to Present
Slice the Chocolate Swiss Roll Cake into even rounds and arrange them in a circle on a platter for a flower-like effect, or present single slices standing upright to spotlight that gorgeous swirl. Tiny flags, edible flowers, or a drizzle of white chocolate can turn this into a festive centerpiece for any gathering.
Make Ahead and Storage
Storing Leftovers
Wrap your Chocolate Swiss Roll Cake tightly in plastic or an airtight container and keep it chilled in the refrigerator. It stays fresh and moist for up to 3 days—though good luck making it last that long if you have dessert fans in the house!
Freezing
This cake is wonderfully freezer-friendly. Wrap individual slices or the whole roll (without ganache) in several layers of plastic wrap, then foil. To serve, let it thaw in the refrigerator overnight, then finish with ganache just before enjoying for best flavor and texture.
Reheating
Since it’s a chilled dessert, you don’t need to reheat the Chocolate Swiss Roll Cake. If serving from the freezer, simply let it rest at room temperature for about 15 minutes before enjoying to bring out its flavors and restore its soft texture.
FAQs
Why does my sponge cake crack when I roll it?
The secret is to roll the cake while it’s still warm and flexible; if you wait too long, it sets and cracks. Rolling with a kitchen towel dusted with powdered sugar also helps prevent sticking and breakage.
Can I make the Chocolate Swiss Roll Cake a day in advance?
Absolutely! In fact, preparing it a day ahead allows the flavors to meld and makes slicing even easier. Just keep it chilled and add the final ganache and decorations before serving.
What chocolate is best for the ganache?
Opt for high-quality dark chocolate (at least 60 percent cacao) for a lush, shiny ganache that balances the sweetness of the filling and enhances the chocolate flavor throughout the Swiss roll.
Can I use a different filling?
Definitely! Try flavored whipped creams, a light chocolate mousse, or even a layer of fruit preserves to put a personal spin on your Chocolate Swiss Roll Cake.
How do I get clean slices for serving?
Chill the cake thoroughly before slicing, and use a long, sharp knife wiped clean between cuts for neat, bakery-worthy swirls every time.
Final Thoughts
If you’re ready to wow your friends and family, this Chocolate Swiss Roll Cake is a guaranteed crowd-pleaser. It’s fun to make, beautiful to serve, and even better to eat—so grab your ingredients and give it a try. Happy baking!