

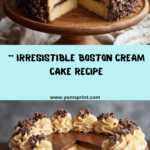
Get ready to experience pure dessert bliss with this Classic & Creamy Boston Cream Cake! Picture ultra-soft vanilla cake layers sandwiching a dreamy, rich pastry cream, all crowned with a decadent layer of chocolate ganache. Every bite is like a celebration, making it the ultimate treat for birthdays, holidays, or simply because you crave something extraordinary. If you’ve always wanted to tackle the cake that combines everything delightful—fluffy cake, creamy filling, and chocolate shine—this recipe is your golden ticket!

Ingredients You’ll Need
The beauty of Classic & Creamy Boston Cream Cake comes from how a handful of pantry staples transform into something show-stopping. Each ingredient brings its own bit of magic, contributing to the cake’s moisture, the pastry cream’s silkiness, or the ganache’s glossy finish. Here’s what you’ll need, and why:
- All-purpose flour: The sturdy foundation that gives your cake layers structure while keeping them tender.
- Baking powder: Ensures the cake rises just enough to be light, airy, and irresistible.
- Salt: A touch balances the sweetness and sharpens all the flavors.
- Unsalted butter (softened): Brings unbeatable richness and helps create that delicate, buttery crumb.
- Granulated sugar: Sweetens the cake and pastry cream, while helping create a moist texture.
- Large eggs: Add structure and richness to your cake, and make the pastry cream extra velvety.
- Pure vanilla extract: The secret behind that signature, comforting aroma and flavor in both cake and cream.
- Whole milk: Delivers tender cake layers and a luscious cream filling—don’t swap for low-fat!
- Cornstarch: Keeps your pastry cream thick and smooth, never runny.
- Heavy cream: Essential for a glossy, pourable chocolate ganache that sets just right.
- Semi-sweet chocolate (chopped): The star of your ganache—rich and just sweet enough.
How to Make Classic & Creamy Boston Cream Cake
Step 1: Prep Your Cake Pans and Oven
Start by preheating your oven to 350°F (175°C). Grease and line two 8-inch round cake pans with parchment paper. This makes sure your cake layers come out perfectly intact, and cleanup will be a breeze.
Step 2: Whisk the Dry Ingredients
In a medium bowl, whisk together the all-purpose flour, baking powder, and salt. This quick step evenly distributes the leavening and salt, ensuring your cake rises to cloud-like heights and tastes balanced in every bite.
Step 3: Cream the Butter and Sugar
Using a large mixing bowl and either a stand mixer or hand mixer, cream the butter and sugar until it’s light and fluffy, about 3-4 minutes. Don’t skimp on this step—it incorporates air and guarantees your cake will be melt-in-your-mouth tender.
Step 4: Add the Eggs and Vanilla
Beat the eggs in one at a time, letting each fully blend in before adding the next. Pour in the vanilla extract, and watch your batter transform with that classic sweet aroma.
Step 5: Combine Wet and Dry Ingredients
Add the dry ingredients to the butter mixture in three additions, alternating with the milk, beginning and ending with the dry. Mix just until combined—overmixing can make your cake dense rather than light and soft.
Step 6: Bake the Cake Layers
Divide the batter evenly between the two prepared pans. Bake for 22–25 minutes, or until a toothpick inserted in the center comes out clean. Let the cakes cool in the pans for 10 minutes before turning them out onto a wire rack to finish cooling completely. Patience here pays off—the cooler they are, the easier they’ll be to assemble later.
Step 7: Make the Pastry Cream
In a saucepan, gently heat your whole milk until steaming but not boiling. Meanwhile, in a bowl, vigorously whisk together sugar, cornstarch, and egg yolks until pale and creamy. Gradually whisk the hot milk into the egg mixture (doing this slowly helps prevent scrambled eggs!). Return everything to the saucepan and cook over medium heat, whisking non-stop, until thickened—about 3-5 minutes. Remove from heat, stir in the butter and vanilla, then press a piece of plastic wrap directly onto the surface. Chill for at least 2 hours to achieve that cool, custardy texture that defines Classic & Creamy Boston Cream Cake.
Step 8: Prepare the Chocolate Ganache
Heat the heavy cream until it just simmers, then pour it over your chopped chocolate in a heat-safe bowl. Let it sit for 2 minutes (resist the urge to stir too soon!), then whisk until silky smooth and glossy. This ganache will drape beautifully over your cake, promising a picture-perfect finish.
Step 9: Assemble the Cake
On a serving plate, place the first cake layer. Spread the chilled pastry cream over the top, right to the edges, then crown with the second cake layer. Pour your shiny ganache over the top, letting those dreamy drips cascade down the sides for that bakery-worthy look. Chill the assembled cake for at least 1 hour—this sets everything up for perfect slicing and serving.
How to Serve Classic & Creamy Boston Cream Cake

Garnishes
The cake is already a showstopper, but adding a few finishing touches can make it truly special. Try a sprinkle of chocolate shavings, a generous dusting of confectioners’ sugar, or a handful of fresh berries on top for a pop of color and freshness.
Side Dishes
For a true treat, serve Classic & Creamy Boston Cream Cake with freshly brewed coffee or strong tea. If you’d like to go the extra mile, a scoop of vanilla ice cream or a dollop of lightly whipped cream adds a cool, creamy complement.
Creative Ways to Present
Want to make this dessert the star of your event? Slice the cake into mini squares for a dessert buffet, or assemble individual mini cakes using a large biscuit cutter for a fun, personal touch. Cupcake versions are a guaranteed hit at birthday parties, too!
Make Ahead and Storage
Storing Leftovers
Keep any leftover Classic & Creamy Boston Cream Cake covered in the refrigerator. An airtight container is your best friend here, helping the cake stay moist and the pastry cream stay fresh for up to three days.
Freezing
If you want to plan ahead, the cake layers (unassembled) can be frozen for up to 2 months—just wrap them tightly in plastic wrap and aluminum foil. While the assembled cake can be frozen, the pastry cream’s texture may change slightly; for the best results, assemble fresh just before serving.
Reheating
There’s no need to reheat Classic & Creamy Boston Cream Cake, as it’s meant to be served chilled. However, if you want to restore the shine to cold ganache, let the cake sit at room temperature for about 20 minutes before serving.
FAQs
Can I use store-bought pastry cream or pudding instead?
Absolutely, if you’re in a time crunch, a good-quality store-bought pastry cream or even vanilla pudding works in a pinch. Just know that homemade pastry cream really elevates the Classic & Creamy Boston Cream Cake to a whole new level!
What’s the best way to get clean slices?
For picture-perfect slices, use a long, sharp knife dipped in hot water and wiped dry before each cut. This prevents the chocolate ganache and pastry cream from pulling or smearing.
Can I make this cake gluten-free?
You can substitute a good gluten-free all-purpose flour blend to make the cake layers, but check your other ingredients to ensure they’re all gluten-free. Classic & Creamy Boston Cream Cake is quite adaptable!
How far in advance can I assemble the cake?
For the best texture and freshest taste, assemble Classic & Creamy Boston Cream Cake up to one day before serving. Longer than that, and the pastry cream may start to soften the cake layers.
Is it possible to use milk chocolate instead of semi-sweet?
Certainly! For a sweeter touch, milk chocolate can replace semi-sweet in the ganache. Just note your ganache may be lighter in flavor, which is lovely with the rich pastry cream.
Final Thoughts
I can’t wait for you to try this Classic & Creamy Boston Cream Cake! Every layer brings something special, and the combination is truly greater than the sum of its parts. Whether you’re baking for a big celebration or just want to wow your loved ones, this cake never fails to impress. Happy baking, and enjoy every slice!
Start sharing, start earning—become our affiliate today! https://shorturl.fm/uzDBe
Promote our brand and watch your income grow—join today! https://shorturl.fm/V6RQ6