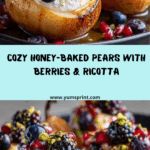
If you’re searching for a cozy, show-stopping winter dessert that’s effortless yet utterly elegant, look no further than Honey-Baked Pears with Winter Berries & Ricotta. This dish brings together luxuriously soft pears, warm spices, ruby-red berries, and a cloud of lemon-scented ricotta cream—all harmonized with a golden drizzle of honey. It’s the kind of sweet treat that feels indulgent but is wonderfully wholesome, perfect for anything from a festive dinner party to a Sunday treat by the fireplace.

Ingredients You’ll Need
The beauty of Honey-Baked Pears with Winter Berries & Ricotta lies in its simplicity and the way each ingredient shines. Every component has a purpose, whether it’s lending creaminess, a pop of color, or a burst of sweet-tart flavor. Here’s what you’ll need—and why each is essential:
- Ripe pears: The star of the show. Choose just-ripe pears for the best soft-but-structured texture after baking.
- Honey: Adds gentle sweetness and caramelizes beautifully in the oven over the pears.
- Melted butter: Gives the pears a silky, rich finish while they roast.
- Vanilla extract: Deepens the flavor with a warm, comforting aroma.
- Cinnamon: A classic spice pairing for pears, offering warmth and depth.
- Nutmeg (optional): Just a pinch awakens the other spices—use fresh if possible for an extra flavor punch.
- Ricotta cheese: Whipped into a luscious cream for a pillowy-soft, subtly tangy base.
- Lemon zest: Brightens the ricotta cream, balancing the honey’s sweetness.
- Salt: Just a pinch to round out the ricotta’s flavors and make the honey pop.
- Winter berries: Use your favorites—a mix of cranberries, blueberries, and raspberries both looks and tastes stunning.
- Pistachios or walnuts (optional): Chopped and sprinkled for a bit of crunch and a nutty accent.
- Extra honey: For that irresistible finishing drizzle that ties all the elements together.
How to Make Honey-Baked Pears with Winter Berries & Ricotta
Step 1: Prep and Halve Your Pears
Start by preheating your oven to 375°F (190°C). While it heats up, give your pears a gentle wash, then halve them lengthwise and scoop out the cores with a spoon. The pears should fit snugly in your baking dish, cut side up—this will help them catch all that delicious spiced honey-butter as they bake.
Step 2: Mix and Brush the Honey-Spice Mixture
Whisk together the honey, melted butter, vanilla extract, cinnamon, and a dash of nutmeg if you’re using it. Generously brush this sweet, fragrant sauce all over the pears, making sure every nook gets a glossy coating. This will create irresistible caramelization in the oven.
Step 3: Bake the Pears
Slide your dish into the oven and let the pears roast for 25 to 30 minutes. They should emerge golden, soft, and slightly collapsing at the edges—the signals that the honey has married beautifully with the fruit. The aroma will be downright dreamy!
Step 4: Prepare the Ricotta Cream
While the pears are baking away, whip up the ricotta cream. Simply stir together ricotta cheese, honey, lemon zest, vanilla extract, and a pinch of salt until smooth and pillowy. This luscious cream not only makes Honey-Baked Pears with Winter Berries & Ricotta extra special, but also balances the sweetness with a hint of tang.
Step 5: Warm the Winter Berries
Your berries can be served raw for freshness, or quickly warmed for extra coziness. Just pop them in a pan for a minute or two until glossy and lightly softened. This optional step really amplifies the berries’ juices, swirling them through every bite.
Step 6: Assemble and Serve
To finish, spoon a generous swoop of ricotta cream onto each plate, tuck a warm baked pear half on top, and shower with your winter berries. Drizzle over some extra honey and, if you like, a scatter of toasted nuts for crunch. Serve immediately, while everything is basking in that just-baked glow—this is when Honey-Baked Pears with Winter Berries & Ricotta is at its most magical.
How to Serve Honey-Baked Pears with Winter Berries & Ricotta

Garnishes
Garnishing is where you can really make this dish shine. Go for a final flourish of lemon zest or a few fresh mint leaves for a hit of herbal freshness. Toasted pistachios or walnuts add incredible texture and nutty richness, while a last drizzle of honey gives that irresistible, sticky-sweet sheen on top.
Side Dishes
For a festive meal, Honey-Baked Pears with Winter Berries & Ricotta pairs beautifully with after-dinner coffee, a glass of dessert wine, or even a cinnamon-laced hot chocolate. Serve it as a light and elegant finish to a hearty winter stew or roast—it’s just sweet enough to satisfy without weighing you down.
Creative Ways to Present
Layer everything in individual glass tumblers for a parfait-style presentation—perfect for dinner parties! Or slice the pears into thick wedges and nestle them atop the ricotta cream on a rustic wooden platter for a stunning buffet centerpiece. You can even stack the pears and ricotta in crêpes for a fun brunch twist on Honey-Baked Pears with Winter Berries & Ricotta.
Make Ahead and Storage
Storing Leftovers
If you happen to have leftovers (it’s rare, but it happens!), place the baked pears, berries, and ricotta cream in separate airtight containers. Storing everything separately keeps the textures just right. The components will stay fresh in the refrigerator for up to 3 days.
Freezing
While the pears and berries can be frozen for up to a month, the ricotta cream is best enjoyed fresh, as its texture can change after freezing. To freeze, lay the cooled pears and berries on a baking sheet to freeze individually, then transfer to a freezer-safe bag. Thaw overnight in the fridge before serving.
Reheating
When you’re ready to enjoy Honey-Baked Pears with Winter Berries & Ricotta again, gently reheat the pears and berries in a 300°F (150°C) oven or in the microwave in short bursts, until warmed through. Stir your ricotta cream and dollop on top just before serving for the best flavor and mouthfeel.
FAQs
Can I use a different cheese instead of ricotta?
Definitely! While ricotta is classic for its creamy sweetness, mascarpone works beautifully for a similar but richer result, and thick Greek yogurt will add a lovely tang. Just keep in mind that each swap brings its own texture and flavor to your Honey-Baked Pears with Winter Berries & Ricotta.
What types of pears work best for baking?
Bosc and Anjou pears are fantastic because they keep their shape and become tender without turning mushy. Just be sure to pick ones that aren’t too ripe, as overripe pears can fall apart during baking.
Can I make this dish dairy free?
Absolutely! For a dairy-free twist, opt for almond- or cashew-based ricotta alternatives and use vegan butter (or even coconut oil) in the honey mixture. The flavors will still sing, and you’ll have a completely plant-based Honey-Baked Pears with Winter Berries & Ricotta to share.
Do I have to use fresh berries, or can I use frozen?
Frozen berries work perfectly well, especially in colder months when fresh may be hard to find. Just warm them gently in a pan until their juices release, and use them as you would fresh for that juicy pop atop your honey-baked pears.
Is this dessert suitable for making in advance?
Yes, you can bake the pears and prepare the ricotta cream a day ahead—just store them separately. Assembly should be done right before serving for the best presentation and freshness. This makes Honey-Baked Pears with Winter Berries & Ricotta an ideal stress-free dessert for entertaining!
Final Thoughts
The simple yet stunning Honey-Baked Pears with Winter Berries & Ricotta always wins hearts, whether it’s a quiet family night in or a lavish winter gathering. Its balance of cozy, creamy, and just a little bit fancy will have everyone asking for seconds. Go ahead and treat yourself and your loved ones to this heartwarming dessert—you’ll be making it all season long!