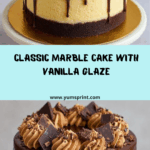
Marble Cake is a timeless classic, loved for its gorgeous swirls that combine luscious vanilla and rich chocolate in every bite. With its moist crumb, striking appearance, and that irresistible homemade sweetness, this cake truly stands out at any table. Whether you’re baking for a special gathering or just craving an afternoon treat, Marble Cake brings both nostalgia and celebration together in one unforgettable dessert.

Ingredients You’ll Need
The beauty of Marble Cake lies in its simplicity—each ingredient harmoniously coming together to create a cake that’s soft, flavorful, and stunning. Let’s break down what you’ll need and how every element makes its mark on both the taste and look of your finished cake:
- All-purpose flour: Gives body and structure to your Marble Cake, resulting in a perfect crumb.
- Baking powder: Ensures a wonderful rise and keeps the cake tender rather than dense.
- Salt: Enhances the flavors and deepens both the chocolate and vanilla notes.
- Unsalted butter: Provides rich flavor and helps create that irresistible, tender texture.
- Granulated sugar: Adds sweetness and also helps in creating a flawless, fluffy texture by creaming with the butter.
- Large eggs: Bind everything together and add richness for a decadent bite.
- Vanilla extract: The star of the vanilla swirl—don’t skimp, as it brings irresistible aroma and taste.
- Whole milk: Keeps the cake super moist and silky, balancing both batters perfectly.
- Unsweetened cocoa powder: Gives that deep, chocolatey swirl, making each slice a little adventure.
- Powdered sugar: Makes the glaze delicate and smooth without any graininess.
- Milk (for glaze): Brings the glaze together for the perfect drizzly finish.
- Vanilla extract (for glaze): Rounds out the sweetness with a fragrant kick.
How to Make Marble Cake
Step 1: Prepare Your Pan and Preheat
Before you dive into mixing batters, set yourself up for a stress-free experience. Preheat your oven to 350°F (175°C) so it’s hot and ready. Line your 9×9-inch baking pan with parchment paper and give it a generous greasing—this ensures your Marble Cake pops out beautifully once baked, with all its gorgeous swirls intact.
Step 2: Combine the Dry Ingredients
In a mixing bowl, whisk together your flour, baking powder, and salt. This dry blend is key to a cake that’s tender but holds its shape. Mixing them now means your leavening agents and salt are perfectly distributed, helping prevent any odd flavor pockets or uneven rising later.
Step 3: Cream Butter and Sugar
Grab another large bowl and beat the softened butter and granulated sugar together until the mixture looks pale and fluffy—this should take about three to five minutes. It’s worth the extra minute or two for maximum airiness, as this step sets the stage for a light, melt-in-your-mouth Marble Cake.
Step 4: Add Eggs and Vanilla
One at a time, add your eggs, mixing well after each addition. This ensures a silky smooth batter that’s full of richness and binds everything together. Finally, pour in the vanilla extract and beat it through for that signature sweet aroma.
Step 5: Alternately Add Dry Ingredients and Milk
With your mixer on low, add the flour mixture in three additions, alternating with the milk. Start and finish with the dry ingredients. This slow-and-steady approach keeps your batter smooth and prevents over-mixing, so your Marble Cake stays ultra-soft and never tough or dry.
Step 6: Make the Chocolate Swirl
Divide your batter evenly between two bowls. Into one bowl, sift in the unsweetened cocoa powder and stir gently until it’s a luscious chocolate batter. Suddenly, you have two delicious batters ready for a dramatic, marbled effect.
Step 7: Swirl and Bake
Spoon the vanilla and chocolate batters alternately into your prepared pan. Take a butter knife and gently swirl the two batters together with a couple of figure-eights—the goal is beautiful ribbons, not a full mix! Bake for 30-35 minutes, or until a toothpick poked in the center comes out clean. Let the cake cool fully in the pan before glazing.
Step 8: Add the Glaze
Now for that dreamy finishing touch: whisk powdered sugar, milk, and vanilla until you get a smooth, pourable glaze. Drizzle it generously over your cooled cake, letting it drip over the sides. Once set, admire your masterpiece before slicing in!
How to Serve Marble Cake

Garnishes
Even the swirls don’t have to do all the work! Add a light dusting of powdered sugar, a handful of fresh berries, or a sprinkle of chocolate curls to really make your Marble Cake pop against a pretty platter. These little touches keep things fun and elegant without extra fuss.
Side Dishes
If you want your dessert moment to linger, Marble Cake is lovely alongside a scoop of vanilla ice cream, a dollop of barely sweetened whipped cream, or even with a mug of hot cocoa. These pairings let the warm flavors of chocolate and vanilla shine even brighter.
Creative Ways to Present
For a show-stopping presentation, try cutting the Marble Cake into fun shapes with cookie cutters, stacking cubes for a mini dessert tower, or layering slice with berries and cream for a parfait. A drizzle of extra glaze or chocolate sauce can add an extra wow factor, too—a delight at parties or for an extra-special family treat!
Make Ahead and Storage
Storing Leftovers
If you’re lucky enough to have leftovers, keep your Marble Cake moist and fresh by storing slices in an airtight container at room temperature for up to three days. Keep the container out of direct sunlight and away from heat to maintain the cake’s soft texture.
Freezing
Marble Cake freezes surprisingly well! Wrap individual slices tightly in plastic wrap and pop them into a freezer bag or airtight container. They’ll stay delicious for up to two months—just thaw them at room temperature when you’re ready to indulge again.
Reheating
To bring leftover slices back to their fresh-baked glory, microwave each piece for just 10-15 seconds or pop them in a low oven (300°F) for about 5 minutes. The cake will regain its pillowy softness and that cozy, fresh-baked aroma.
FAQs
Can I use a different pan size for this Marble Cake?
Absolutely! If you don’t have a 9×9-inch pan, you can use an 8×8-inch pan for a slightly taller cake (just add a minute or two to the baking time), or even make cupcakes—just adjust the bake time to about 18-22 minutes and keep an eye on them.
What’s the best way to get distinct swirls when making Marble Cake?
The trick is to add dollops of each batter alternately, not just layering one on top of another. Run a knife through in figure-eights just once or twice to keep the swirls crisp rather than muddy. Less swirling means more definition!
Can I use butter alternatives or plant-based milk?
Definitely! If you need a dairy-free version, swap unsalted butter for a vegan substitute and use almond, soy, or oat milk. The cake will still be marbled, moist, and delicious, though with a slightly different flavor profile.
How do I know when the cake is done?
The cake is ready when a toothpick or cake tester inserted in the center comes out clean or with just a few moist crumbs. If you see wet batter, give it a few more minutes and test again in a different spot for accuracy.
Can I double the recipe for a crowd?
Yes! Double the ingredients and bake in a 9×13-inch pan. Keep an eye on the edges, as they may bake a little faster than the center; total baking time will be around 40-45 minutes. The result is a party-sized Marble Cake everyone will love.
Final Thoughts
Don’t wait for a special occasion—treat yourself and your loved ones to the simple joy of homemade Marble Cake. With its dazzling swirls and irresistible flavor, it’s guaranteed to spark conversation and smiles around your table. Give it a try and let your kitchen fill with the delicious scent of nostalgia and celebration!