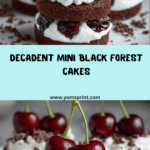
If you’re ready to impress both your eyes and your taste buds, this Mini Black Forest Cakes Recipe is just the delightful treat you need to try! These adorable individual chocolate cakes are filled with swirls of luscious whipped cream and juicy cherries, then topped with shavings of dark chocolate and fresh fruit for a dreamy bite. Every mouthful captures the magic of the classic Black Forest cake in an irresistibly cute, personal-sized version. Whether you’re celebrating a special occasion or simply craving something indulgent, this recipe brings together deep cocoa flavors, creamy richness, and that signature tangy cherry burst, all wrapped up in a dessert you’ll be proud to share (or keep for yourself!).

Ingredients You’ll Need
A few simple but thoughtfully chosen ingredients are the building blocks of this Mini Black Forest Cakes Recipe. Each one plays a vital role, lending the perfect flavor, texture, or gorgeous color to these tempting little cakes.
- All-purpose flour: Provides the structure for a soft yet stable chocolate sponge cake base.
- Unsweetened cocoa powder: Delivers rich, chocolatey depth—the heart of any Black Forest dessert.
- Baking powder and baking soda: Work together for a perfectly tender rise and fluffy crumb.
- Salt: Enhances and balances the sweetness, making the chocolate flavor pop.
- Sugar: Sweetens the cake just right and helps keep it moist.
- Large eggs (room temperature): Bind everything together and add richness to the sponge.
- Vegetable oil (or melted butter): Ensures a moist, tender cake; oil adds lightness, while butter brings a richer flavor.
- Vanilla extract: Rounds out the flavors with a warm, aromatic note.
- Buttermilk (or milk + lemon juice): Introduces lovely tang and creates a soft, tender crumb.
- Hot coffee (or hot water): Intensifies the chocolate flavor and keeps the cake ultra-moist.
- Heavy cream (chilled): Whips up into a dreamy, cloud-like topping and filling—essential for that classic Black Forest experience.
- Powdered sugar: Sweetens the whipped cream without any graininess.
- Cherry pie filling (or cooked fresh cherries): Gives a juicy, sweet-tart contrast that instantly transports you to the Black Forest.
- Fresh cherries (for garnish): Bring color, freshness, and a charming finishing touch.
- Dark chocolate shavings: Add a pop of bittersweet richness and elegant visual flair.
How to Make Mini Black Forest Cakes Recipe
Step 1: Bake the Chocolate Sponge Cakes
Start by preheating your oven to 350°F (175°C) and lining a baking sheet or cake pan—this guarantees your cakes pop out perfectly. Sift the flour, cocoa powder, baking powder, baking soda, and salt together into one bowl to eliminate lumps and blend everything evenly. In a second bowl, whisk together the sugar, eggs, oil, and vanilla extract until silky smooth. Pour in the buttermilk and give it a gentle mix. Next, combine your wet and dry ingredients, stirring until just unified, and finish by pouring in hot coffee to make the batter glossy and deliciously thin. Spread the batter across the pan, then bake for 20–25 minutes, or until a toothpick comes out clean. Once cooled, use a round cutter to create mini cake discs—each one ready for layers of cherry and cream!
Step 2: Make the Whipped Cream
It’s time for the dreamy part! In a well-chilled bowl, whip the heavy cream along with powdered sugar and vanilla extract until stiff peaks form. The cream should look thick, glossy, and stable enough to hold its shape. Don’t rush this step—the perfect whipped cream is airy yet supple, ready to cushion the cake and cherries in every blissful bite.
Step 3: Assemble the Mini Cakes
To assemble, start with one of your chocolate cake rounds as a base. Generously pipe or spread on some of the fluffy whipped cream, then add a heaping spoonful of cherry filling for that signature zing. Gently press another cake round on top and layer with more whipped cream. To finish, shower on dark chocolate shavings and crown each cake with a plump fresh cherry. It’s like building a tiny, edible work of art!
Step 4: Chill & Serve
Patience does pay off here—pop your finished mini cakes into the fridge for at least 30 minutes before serving. This quick chill melds the flavors together, letting the cakes settle into their moist, creamy glory. When it’s finally time to serve, you’ll be rewarded with a texture and taste that’s pure Black Forest heaven.
How to Serve Mini Black Forest Cakes Recipe

Garnishes
A true Mini Black Forest Cakes Recipe isn’t finished without those classic garnishes. Top each cake with extra swirls of whipped cream, a glossy maraschino or fresh cherry, and a liberal sprinkle of dark chocolate shavings—these add both eye-catching beauty and a burst of indulgent flavor.
Side Dishes
These cakes are stunning solo but truly shine when paired alongside espresso, a robust cup of coffee, or even a glass of cherry liqueur for grown-up gatherings. For a lighter contrast, serve next to a fresh berry salad or a scoop of vanilla bean ice cream.
Creative Ways to Present
If you’re aiming to wow, stack your cake rounds tall for mini-layered towers, or serve them in elegant glass jars or mason jars for a “trifle” vibe. Tiny cake stands or cupcake wrappers can make them feel extra special at parties. Don’t forget—a dusting of cocoa or a drizzle of cherry syrup can make these treats pop on any dessert buffet!
Make Ahead and Storage
Storing Leftovers
If you have any leftover Mini Black Forest Cakes (rare, but it happens!), keep them covered in the fridge. The cakes will stay fresh for up to three days, although for optimal texture, enjoy within the first two. The flavors meld beautifully over time, staying moist and irresistible.
Freezing
Thanks to their sturdy sponge and whipped cream, you can freeze these mini cakes! Assemble up to the whipped cream layer (skip garnishing), then wrap tightly and freeze for up to a month. Thaw overnight in the fridge before garnishing and serving for best results.
Reheating
While you don’t want to “reheat” these cakes since the cream and cherries are best enjoyed cold, letting them sit at room temperature for 10–15 minutes before serving will soften the cake and bring out the flavors. Avoid microwaving, as this can melt the cream and compromise that delicate texture.
FAQs
Can I make this Mini Black Forest Cakes Recipe gluten-free?
Absolutely! Just swap the all-purpose flour for your favorite 1-to-1 gluten-free baking blend. The cakes will still be moist and delicious with all the classic flavors you love.
Is it possible to use fresh cherries instead of pie filling?
Yes, and it’s a fantastic upgrade! Just simmer pitted fresh cherries with a bit of sugar until they’re jammy and syrupy—this adds a real burst of summer and keeps the filling tasting bright and homemade.
Can I prepare the Mini Black Forest Cakes Recipe in advance?
Definitely! You can bake the sponge and even whip the cream a day ahead. Assemble the cakes a few hours before serving, keep them chilled, and add the garnishes just before bringing them to the table for the best presentation.
What can I use instead of buttermilk?
No buttermilk on hand? Simply mix half a cup of milk with 1 teaspoon of lemon juice or vinegar and let it sit for five minutes. This quick substitute brings the same tang and tenderness to your sponge.
How many cakes does this recipe yield?
You should get about 8–10 mini cakes, depending on the size of your cutter and the thickness of your layers. It’s the perfect amount for a small gathering—or to keep a few hidden away for yourself!
Final Thoughts
Bring joy and a touch of nostalgic magic to your kitchen with this Mini Black Forest Cakes Recipe. They’re shockingly easy to create, endlessly satisfying, and guaranteed to dazzle at any occasion. I can’t wait for you to try your own version—so whip up a batch and let every bite transport you right to the heart of the Black Forest!