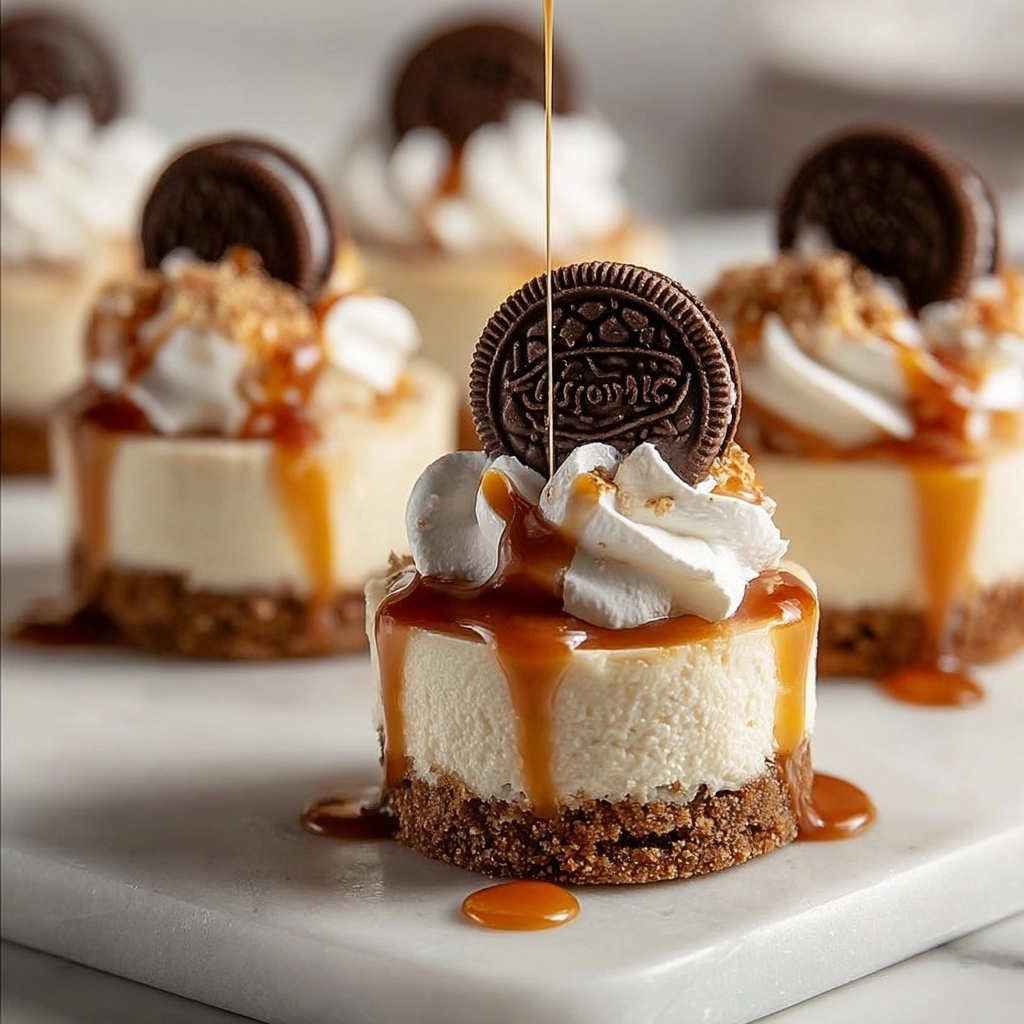
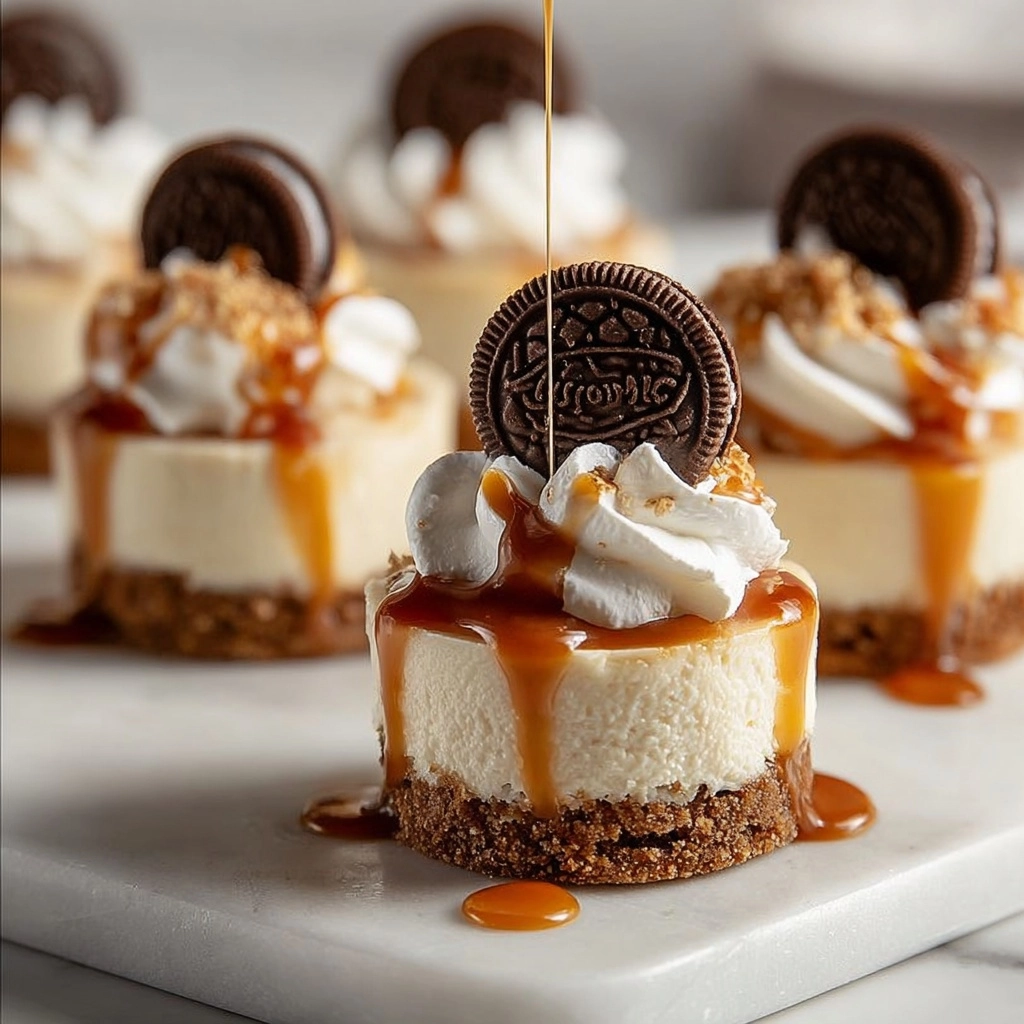
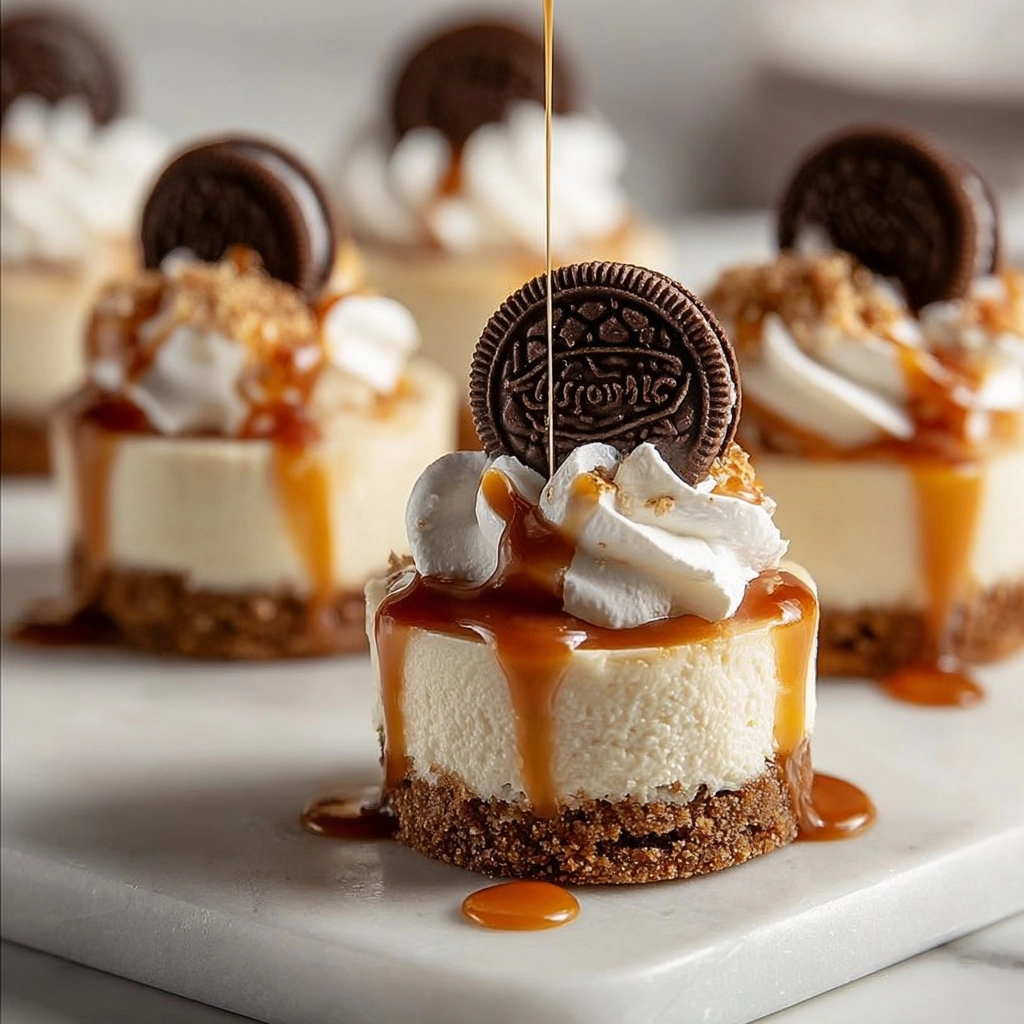
If you adore buttery crusts, velvety cheesecake, and gooey homemade caramel, this Mini Caramel Cheesecakes Recipe is guaranteed to steal your heart (and taste buds!). Imagine bite-sized cheesecakes that deliver all the decadence of a classic dessert, but in a perfectly portioned, party-ready format. Each little treat features a crisp biscuit base, a rich and creamy filling, and an irresistible salty-sweet caramel drizzle, making these mini cheesecakes the absolute star of any dessert table.

Ingredients You’ll Need
This Mini Caramel Cheesecakes Recipe comes together with a handful of pantry heroes and a few fridge staples. Each ingredient plays an important role; don’t skip or swap unless you’re feeling adventurous, because the magic is in how these flavors and textures come together.
- Digestive biscuits or graham crackers: These form the base, bringing that classic, toasty flavor and sturdy texture that holds up to creamy filling.
- Unsalted butter: Melted butter binds your crumbs for the perfect crumbly yet cohesive crust.
- Brown sugar (optional): Adds a lovely caramel note and slight crunch to the crust if you want a little something extra.
- Cream cheese: Room temperature cream cheese ensures an ultra-smooth, lump-free filling — don’t rush this step!
- Granulated sugar: Sweetens both the filling and the caramel sauce, balancing richness with brightness.
- Eggs: These set the cheesecake with a custardy texture and help create that signature creamy bite.
- Sour cream: Gives a tangy lift that keeps the filling from feeling too heavy, plus it adds a slight silkiness.
- Vanilla extract: Just a splash goes a long way in rounding out all the flavors and making the cheesecake taste bakery-fresh.
- Heavy cream: Essential for turning caramel sauce satiny and pourable.
- Pinch of salt: Salt is the magic that amplifies the caramel’s sweetness and keeps it from going flat.
- Whipped cream: For a little flourish on top — pillowy, pretty, and fun to pipe.
- Chocolate coins/discs (optional): These add a hint of bitterness and a gorgeous finish, but feel free to skip or substitute with your favorite topping.
How to Make Mini Caramel Cheesecakes Recipe
Step 1: Prepare the Crust
Begin by crushing your digestive biscuits or graham crackers into fine, sand-like crumbs. A food processor works wonders, but a zip-top bag and rolling pin do the trick if you’re channeling your inner baker. Mix the crumbs with melted unsalted butter and, if you’re up for a little extra crunch, a couple spoonfuls of brown sugar. Line your muffin tin with cupcake wrappers or use mini cheesecake molds, then press the crumb mixture firmly into the bottom of each cup. Pop in the oven at 175°C (350°F) for 5 minutes — just enough to set them — and set aside while you make the filling.
Step 2: Blend the Cheesecake Filling
For that dreamy, smooth cheesecake texture, beat your room temperature cream cheese until it’s completely lump-free. Add granulated sugar and vanilla extract, mixing until everything is light and creamy. Add the eggs one at a time, beating gently and scraping the bowl between additions. Finally, stir in your sour cream for a dose of tang and silkiness. Spoon the mixture evenly over your prepared crusts, smoothing the tops with a spoon or spatula.
Step 3: Bake and Chill
Bake the filled mini cheesecakes at 160°C (320°F) for 15–18 minutes. You’re looking for centers that are just set but still have the slightest wobble. This guarantees a creamy, melt-in-your-mouth texture once chilled! Allow the cheesecakes to cool to room temperature, then pop them in the fridge for at least 4 hours (overnight is even better). This chilling time is the secret to a perfectly firm yet creamy filling.
Step 4: Cook Up the Caramel Sauce
For that show-stopping finish, make a simple but decadent caramel sauce. In a saucepan, melt granulated sugar over medium heat, swirling gently (no need to stir!) until it turns a deep amber. Carefully add the butter, stirring continuously, then slowly stream in heavy cream while whisking — it will bubble up vigorously at first, so be prepared! Add a pinch of salt, stir to combine, and let cool to room temperature. This sauce will be glossy, thick, and supremely pourable.
Step 5: Decorate and Enjoy
Once the cheesecakes are fully chilled, it’s time to turn them into little works of art. Pipe swirls of whipped cream on top of each, drizzle generously with your homemade caramel sauce, and (if you want to fancy things up) crown each cheesecake with a chocolate disc or medallion. Stand back and admire your batch of elegant, irresistible treats!
How to Serve Mini Caramel Cheesecakes Recipe

Garnishes
Don’t underestimate the power of a beautiful garnish! For this Mini Caramel Cheesecakes Recipe, the trio of whipped cream, glossy caramel, and chocolate coins creates a bakery-worthy look with very little effort. You can also finish with a sprinkle of flaky sea salt for an extra-special touch or a few chopped nuts for crunch.
Side Dishes
Since these cheesecakes are rich and sweet, consider pairing them with something fresh and light. A bowl of juicy berries or a crisp fruit salad is perfect for cutting through the caramel, or serve alongside a strong cup of coffee or espresso for an afternoon pick-me-up.
Creative Ways to Present
Presentation is where you can really let your creativity shine! Stack the cheesecakes on a tiered platter for an eye-catching dessert display, or plate individually with an extra swoosh of caramel and a scattering of chocolate shavings. For parties, tuck them into mini cupcake boxes as adorable take-home favors.
Make Ahead and Storage
Storing Leftovers
One of the best things about this Mini Caramel Cheesecakes Recipe is how well it keeps! Store any leftovers in an airtight container in the fridge for up to 4 days. The crust stays firm, and the caramel flavor actually deepens overnight.
Freezing
Want to get ahead? These mini cheesecakes freeze beautifully. Arrange them (without whipped cream or caramel) on a baking sheet and freeze until solid, then transfer to a zip-top bag or airtight container. Thaw in the fridge overnight, and decorate just before serving for best results.
Reheating
Cheesecake is best enjoyed cold or at room temperature, so no need to reheat. If your mini cheesecakes have been frozen, let them come to room temp for about 20-30 minutes for the perfect texture and flavor.
FAQs
Can I use store-bought caramel sauce instead of homemade?
Absolutely! While fresh caramel takes this Mini Caramel Cheesecakes Recipe to the next level, a good-quality store-bought caramel can save time and still tastes delicious. Warm it slightly for easy drizzling.
What’s the best way to crush biscuits for the crust?
A food processor makes quick work of this, but a zip-top bag and rolling pin work just as well. The key is to get fine, even crumbs for a sturdy crust that doesn’t fall apart.
Can I make this recipe gluten-free?
Definitely! Swap the digestive biscuits or graham crackers with your favorite gluten-free alternative. Everything else in this Mini Caramel Cheesecakes Recipe is naturally gluten-free, so go ahead and make it work for your needs.
Do I need to use cupcake liners?
Cupcake liners make it easier to remove the cheesecakes and keep things neat. If you use silicone molds or a well-greased mini cheesecake pan, you can get by without them — just loosen gently with a thin knife.
How do I know when the mini cheesecakes are baked perfectly?
The center of each should be set but slightly jiggly when you gently shake the pan. They’ll finish setting as they cool, so don’t overbake. Trust the process, and you’ll get beautifully creamy results every time.
Final Thoughts
If you’re ready to dazzle your friends or want a fun baking project, this Mini Caramel Cheesecakes Recipe is pure joy on a plate. Each bite brings the perfect blend of creamy, crunchy, and caramel, making dessert something everyone looks forward to. Give these a try — you’ll want to make them for every celebration (or just because!).

