

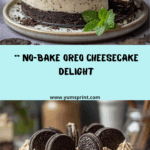
If you’re seeking a dessert that combines pure indulgence with pure simplicity, look no further than No-Bake Oreo Cheesecake. This decadent treat brings together a silky, cloud-like cheesecake filling flecked with crunchy Oreo pieces, all nestled atop a buttery chocolate cookie crust—no oven required! Whether you’re celebrating a special occasion or just want to spoil yourself and your loved ones, this No-Bake Oreo Cheesecake promises effortless joy in every slice. Its cool, creamy texture and intense cookies-and-cream flavor make it instantly irresistible.

Ingredients You’ll Need
You’ll be amazed by how just a few carefully chosen ingredients transform into such a show-stopping dessert. Each element plays a key role, ensuring your No-Bake Oreo Cheesecake delivers maximum flavor, dreamy texture, and just the right amount of chocolatey bliss.
- Oreo Cookies (for crust and filling): The iconic chocolate wafer and crème combo provides both the crunchy base and delectable cookie chunks throughout the cheesecake.
- Unsalted Butter, melted: Acts as the binding agent for the cookie crust and adds a rich flavor that complements the Oreos perfectly.
- Cream Cheese, softened: This is the backbone of your cheesecake, delivering that signature tang and creamy consistency.
- Powdered Sugar: Sweetens the filling while keeping it smooth and lump-free for that perfect cheesecake texture.
- Vanilla Extract: Just a splash brings out the depth of flavor and balances the sweetness of the cookies and the cream cheese.
- Heavy Whipping Cream, cold: Whipped until fluffy, this lightens the filling, making it airy and melt-in-your-mouth luscious.
- Whipped Cream (for garnish): Adds a whimsical, decorative touch to the finished cake and another layer of creamy goodness.
- Crushed/Whole Oreos (for garnish): Gives your finished cheesecake irresistible visual appeal and an extra pop of cookie crunch.
How to Make No-Bake Oreo Cheesecake
Step 1: Prepare the Oreo Crust
Start by placing 24 Oreo cookies into a food processor and blitzing them into fine crumbs. Pour in the melted butter and pulse until you have a mixture that resembles wet sand. Scoop this onto the bottom of a 9-inch springform pan and press it down firmly, making sure you have an even layer that reaches the edges. The buttery Oreo crust acts as a solid and flavorful foundation, so don’t rush this step! Pop the pan into the fridge and let the crust chill for 30 minutes to set.
Step 2: Make the Cream Cheese Filling
In a large bowl, beat the softened cream cheese until completely smooth and lump-free (no one wants a clumpy cheesecake!). Add the powdered sugar and vanilla extract, then continue mixing until luscious and fully combined. This step lays the groundwork for that rich yet tangy cheesecake filling we all crave in a classic No-Bake Oreo Cheesecake.
Step 3: Whip the Cream
Pour the cold heavy cream into a separate clean bowl and whip it using a hand mixer or stand mixer until stiff peaks form. You’re aiming for a fluffy, stable whipped cream, so don’t under-whip! This is what lightens the entire filling, giving every bite of your No-Bake Oreo Cheesecake that airy, mousse-like texture.
Step 4: Fold Everything Together
Carefully fold your whipped cream into the cream cheese mixture, working gently to keep as much volume as possible. Once combined, sprinkle in the chopped Oreos (another 24 cookies’ worth!) and fold those in too. These bits turn every slice into an Oreo lover’s dream, and you’ll notice the flecks of cookie throughout your creamy filling.
Step 5: Assemble and Chill
Spoon the luscious cheesecake filling onto your chilled crust and smooth the surface with a spatula. The goal is a nice even layer with a cloudlike finish. Cover the pan with plastic wrap and refrigerate the cheesecake for at least 6 hours, or ideally overnight. This resting time is critical—it allows the flavors to meld and the filling to set perfectly for clean, beautiful slices.
Step 6: Garnish and Serve
Just before serving, unleash your inner decorator! Pipe or dollop swirls of whipped cream around the edges, scatter more crushed or whole Oreos on top, and get ready for the oohs and ahhs. Every slice will look as irresistible as it tastes, making your No-Bake Oreo Cheesecake a guaranteed centerpiece.
How to Serve No-Bake Oreo Cheesecake

Garnishes
A final flourish of whipped cream, crushed Oreos, and maybe even a few whole Oreos placed upright like edible trophies takes your No-Bake Oreo Cheesecake to the next level. These simple touches add both stunning visual appeal and extra layers of creamy, crunchy texture. You can also try chocolate curls or a drizzle of chocolate sauce for an extra-decadent finish.
Side Dishes
Since this cheesecake is so rich and utterly satisfying, pairing it with lighter accompaniments is the way to go. Offer some fresh mixed berries on the side for a pop of color and tartness, or serve with strong coffee, espresso, or an icy glass of milk to complement the creamy sweetness.
Creative Ways to Present
For parties or special gatherings, try making mini No-Bake Oreo Cheesecakes in individual jars or muffin tins for adorable, grab-and-go servings. You can also layer the crust and filling in parfait glasses for a deconstructed look, or serve slices with a playful scoop of cookies-and-cream ice cream. Let your creativity shine—no two cheesecakes need to look the same!
Make Ahead and Storage
Storing Leftovers
Store any remaining No-Bake Oreo Cheesecake tightly covered in the refrigerator. It will stay fresh and delicious for up to 4 days—just make sure it’s sealed well to keep the filling from absorbing fridge odors and to maintain its creamy texture.
Freezing
You can absolutely freeze No-Bake Oreo Cheesecake for future cravings! After chilling and garnishing, wrap the pan tightly with plastic wrap and aluminum foil, then freeze for up to two months. When you’re ready to enjoy, thaw the cheesecake in the fridge overnight for the best texture.
Reheating
The beauty of this cheesecake is that it’s meant to be served cold—no reheating necessary! If frozen, simply let it thaw in the refrigerator until it’s perfectly sliceable and creamy again. Always avoid microwaving, which can alter both the texture and flavor.
FAQs
Can I use different flavors of Oreo cookies in this recipe?
Absolutely! Feel free to swap in Golden Oreos or any seasonal variation to put your own spin on classic No-Bake Oreo Cheesecake. The only thing to note is that colored or filled Oreos may affect the flavor or appearance—experiment and have fun!
What if I don’t have a springform pan?
No worries! You can use a deep-dish pie pan or even make individual cheesecakes in muffin tins with cupcake liners. Just keep in mind that springform pans make it much easier to unmold the cheesecake for a dramatic presentation.
Can I make No-Bake Oreo Cheesecake ahead of time?
Definitely! In fact, making it a day in advance is ideal since it needs plenty of chilling time to set properly. This also gives the flavors time to meld and makes entertaining a breeze.
Why isn’t my cheesecake firm enough?
Usually, this is due to under-whipping the cream or not chilling the cheesecake long enough. Make sure your heavy cream reaches stiff peaks, and always let your cheesecake refrigerate a full 6 hours (or overnight) to get those perfect, neat slices.
Can I make this recipe gluten free?
Yes! Simply use gluten-free chocolate sandwich cookies in place of traditional Oreos for both the crust and the filling. All other ingredients are naturally gluten free, so you can adapt this No-Bake Oreo Cheesecake for everyone to enjoy.
Final Thoughts
If you’re looking for a recipe that’s as fun to make as it is to eat, No-Bake Oreo Cheesecake is your new go-to. Dreamy, decadent, and impossibly easy, this creamy dessert is sure to steal the spotlight at your next get-together. You owe it to yourself (and your sweet tooth) to try this sensational, crowd-pleasing treat!
Promote our products and earn real money—apply today! https://shorturl.fm/7nfgT
Start profiting from your network—sign up today! https://shorturl.fm/YJknX