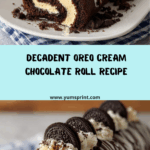
If you’re a fan of chocolate, cream, and Oreos (and honestly, who isn’t?), the Oreo Cream Chocolate Roll is about to become your new favorite dessert obsession. Imagine a tender, chocolatey sponge cake wrapped around a luxuriously fluffy cream cheese filling studded with crushed Oreos, then drizzled with sweet white chocolate. This eye-catching treat doesn’t just taste like heaven—it’s fun to make and even more fun to eat. Whether you’re celebrating something special or simply craving a cozy baking day, Oreo Cream Chocolate Roll brings a dreamy combination of flavors and textures you’ll crave again and again.

Ingredients You’ll Need
It’s amazing how a handful of pantry staples come together to create something this memorable! Each ingredient in Oreo Cream Chocolate Roll brings its own spin, from the rich base to the creamy filling and crisp cookie crumbles.
- Chocolate cake mix (or homemade chocolate sponge): Brings the rich, moist backbone to the roll—use your favorite mix or bake from scratch for extra flair.
- Large eggs: Help the batter rise and keep the cake soft and flexible enough for rolling.
- Water: Adds the necessary moisture to achieve a tender crumb in the chocolate cake.
- Vegetable oil: Keeps the cake light, moist, and easy to roll without cracking.
- Cream cheese, softened: Gives the filling a rich and slightly tangy creaminess that balances the sweetness perfectly.
- Heavy cream, chilled: Whips into fluffy peaks, making the Oreo Cream Chocolate Roll filling luxuriously smooth and light.
- Powdered sugar: Sweetens the filling and ensures it stays silky and lump-free.
- Vanilla extract: Adds depth and a warm finish to both the cake and the cream filling.
- Oreo cookies, crushed: The star element—those chocolatey bits and creamy centers dot every bite!
- White chocolate chips, melted: Drizzled on top, they add a sweet and elegant finish that looks as good as it tastes.
- Extra crushed Oreos: The perfect garnish for crunch and that unmistakable Oreo flair.
How to Make Oreo Cream Chocolate Roll
Step 1: Bake the Sponge
Start by preheating your oven to 350°F (175°C) and lining a 10×15-inch jelly roll pan with parchment paper—this ensures your cake won’t stick and will roll smoothly later. Prepare your chocolate cake batter as directed on the box (or from scratch), then pour and spread it evenly in the pan. Bake for 12–15 minutes, and don’t wander off! The cake should be just set; a toothpick inserted in the center should come out clean. That tender texture is what makes the Oreo Cream Chocolate Roll so satisfying.
Step 2: Roll the Cake
Once your cake is finished and still warm, gently turn it out onto a clean kitchen towel that’s been dusted with powdered sugar. The sugar keeps the cake from sticking and adds a subtle sweetness. Carefully peel off the parchment paper. Starting from the short end, roll the cake up with the towel. This initial shaping helps the cake “remember” the roll and prevents cracks later. Let it cool completely before the next step—you don’t want the filling to melt!
Step 3: Make the Filling
For the dreamy, Oreo-studded filling, beat the softened cream cheese until it’s completely smooth (no lumps allowed!). Mix in the powdered sugar and vanilla extract for that signature flavor. In a separate bowl, whip the chilled heavy cream into stiff peaks—this helps keep the filling light and airy. Gently fold the whipped cream into the cream cheese mixture, then sprinkle in the crushed Oreos and blend until you have flecks of cookies evenly throughout. Resist the urge to eat it all right now—the best is yet to come!
Step 4: Fill and Roll Again
Unroll your cooled cake and evenly spread the Oreo cream filling all over, going all the way to the edges for maximum flavor in every bite. Carefully re-roll the cake, this time without the towel. Take it slow and steady. Don’t worry if a little filling peeks out; that irresistible swirl is part of the charm of Oreo Cream Chocolate Roll.
Step 5: Decorate
Melt your white chocolate chips until they’re silky and smooth (a microwave or double boiler both work well). Drizzle the melted white chocolate over the top of your roll using a spoon or piping bag for pretty stripes and extra sweetness. Finish with a generous sprinkle of extra crushed Oreos—this not only adds crunch but makes the roll look absolutely stunning.
Step 6: Chill and Serve
Pop the finished Oreo Cream Chocolate Roll in the refrigerator for at least 30 minutes before slicing. This little chill time lets the filling set and makes for clean, easy cuts. Slice thick or thin—either way, serve cold and watch it disappear in a flash!
How to Serve Oreo Cream Chocolate Roll

Garnishes
For an eye-catching presentation, drizzle extra melted white chocolate right before serving and top each slice with a mini Oreo or a dusting of cookie crumbs. A few fresh berries or a sprig of mint add gorgeous color and a fresh pop alongside all that chocolate goodness.
Side Dishes
The Oreo Cream Chocolate Roll is a star all on its own, but if you want to serve something on the side, try a small scoop of vanilla ice cream or a cup of rich hot chocolate. Some people love pairing it with fresh fruit—raspberries and sliced strawberries contrast the sweetness delightfully.
Creative Ways to Present
For parties, slice the roll into mini rounds and serve them upright on a platter, so everyone can admire that classic swirl. Or wrap individual slices in parchment and tie with ribbon for sweet, grab-and-go treats. Kids love grabbing their own “cake sushi” and adults appreciate the nostalgia of that Oreo surprise in every bite.
Make Ahead and Storage
Storing Leftovers
Wrap your Oreo Cream Chocolate Roll tightly in plastic wrap or store in an airtight container in the refrigerator. It will stay fresh and delicious for up to 3 days; just be sure to keep it chilled for the best texture and flavor.
Freezing
To freeze, wrap the whole roll (or individual slices) in a double layer of plastic and then foil to protect from freezer burn. It will keep for up to 2 months. When ready to serve, let it thaw in the fridge overnight—this preserves the creamy filling and cake texture best.
Reheating
The Oreo Cream Chocolate Roll is meant to be served chilled, so no need to reheat! If you find the roll too firm straight from the fridge, just let slices sit at room temperature for 10 minutes to soften up before savoring the deliciousness.
FAQs
Can I use homemade chocolate sponge instead of cake mix?
Absolutely! A homemade chocolate sponge works beautifully and can elevate the flavor further. Just make sure it’s thin enough to roll easily and not too dense, so you get that nice swirl without cracks.
What’s the best way to crush the Oreos?
The easiest method is to place Oreos in a zip-top bag and crush them with a rolling pin. If you want larger chunks in your cream filling, just crush gently, or pulse in a food processor for a finer texture.
Can I substitute the white chocolate topping?
Definitely! You can drizzle milk or dark chocolate instead, or even skip the drizzle and just dust with powdered sugar or more cookie crumbs. The topping is your chance to get creative!
Is this recipe gluten-free?
The classic version is not gluten-free due to the cake mix and Oreo cookies, but you can easily swap in your favorite gluten-free chocolate cake recipe and gluten-free sandwich cookies to adapt it to your needs.
Can I make the Oreo Cream Chocolate Roll the day before?
Yes, and it’s actually a great idea! Making it ahead gives the flavors time to meld. Just keep it wrapped in the fridge and decorate right before serving so the topping stays fresh.
Final Thoughts
I can’t recommend the Oreo Cream Chocolate Roll highly enough—it’s eye-popping, delightfully creamy, and always a crowd-pleaser. Whether you’re a longtime Oreo fan or just love fabulous chocolate desserts, treat yourself to a slice of this easy, impressive roll. Trust me: it’s worth every bite!