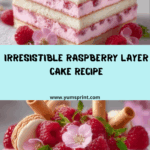
If you’re searching for a gorgeous, celebration-worthy dessert that’s a breeze to make at home, this Raspberry Layer Cake delivers in every possible way. Light, buttery cake layers embrace a lush raspberry buttercream that tastes like summer in every bite, and the playful garnishes turn it into a true showstopper fit for any special occasion. Get ready to fall in love with every vibrant layer, luscious swirl, and fresh pop of berry flavor in this irresistible masterpiece—Raspberry Layer Cake will win hearts wherever it goes!

Ingredients You’ll Need
Baking a Raspberry Layer Cake is all about a perfect balance of basics and brilliance. Each ingredient here has a role—from the tender crumb to the vivid frosting and eye-catching toppings—so don’t skip a thing! Here’s what you’ll need and why:
- All-purpose flour: The sturdy foundation for your cake layers; measured carefully for fluffy consistency.
- Baking powder: The key to achieving those beautifully risen, airy layers.
- Salt: Just a touch to balance the sweetness and enhance every flavor.
- Unsalted butter (for both cake and frosting): For incredible richness and that classic homemade taste—soften well for easy creaming.
- Granulated sugar: Sweetens the cake while also adding moisture and tenderness.
- Eggs: Essential for structure, stability, and a lovely golden crumb.
- Vanilla extract: Infuses warmth and rounds out the raspberry notes perfectly.
- Milk: Keeps the cake moist and balances the crumb—whole milk is best if you have it!
- Powdered sugar: Creates a silky-smooth, plush raspberry frosting that’s easy to spread.
- Fresh raspberry puree: Packs a punch of real berry flavor and creates that pretty pink hue—strain well for the smoothest frosting.
- Milk or cream (for frosting consistency): Add just enough to make the buttercream dreamy and spreadable.
- Fresh raspberries, wafer rolls, small cookies or meringues, fresh mint, edible flowers: These garnishes make your Raspberry Layer Cake look as fabulous as it tastes—use a mix for maximum charm.
How to Make Raspberry Layer Cake
Step 1: Prep the Pans and Preheat
Start by preheating your oven to 350°F (175°C). Generously grease and flour two 8-inch round cake pans so your layers come out beautifully every time. This little step ensures no sticky surprises when it’s time to assemble!
Step 2: Whisk Dry Ingredients
In a medium mixing bowl, whisk together the all-purpose flour, baking powder, and salt. This not only combines them evenly but also aerates the flour, helping you achieve delicate, pillow-soft cake layers.
Step 3: Cream the Butter and Sugar
In a large bowl, cream the softened unsalted butter with the granulated sugar until the mixture is light, fluffy, and pale. Electric mixers make this so much easier! Creaming well at this point guarantees a tender crumb.
Step 4: Add Eggs and Vanilla
Beat in the eggs, one at a time, ensuring each is fully incorporated before adding the next. Stir in the vanilla extract—the aroma is absolute heaven and hints at what’s to come in your Raspberry Layer Cake.
Step 5: Combine Dry and Wet Ingredients
Gradually add the flour mixture to the creamed mixture, alternating with the milk. Begin and end with the flour mixture. Gently mix until just combined so your cake stays light and doesn’t get tough.
Step 6: Bake the Cakes
Divide the batter evenly between your prepared pans, smoothing the tops with a spatula. Bake for 25-30 minutes, until a wooden skewer inserted in the center comes out clean. Let the cakes cool in their pans for 10 minutes before turning them onto a wire rack to cool completely. Patience here ensures perfect layering later!
Step 7: Make the Raspberry Frosting
Beat the softened butter until creamy and smooth. Gradually add powdered sugar, then pour in the fresh raspberry puree (strained for extra-smoothness). Beat until fluffy, adjusting with a splash of milk or cream for your desired texture. The result? A vibrant pink icing that’s utterly swoon-worthy.
Step 8: Layer and Frost the Cake
Once the cakes are cool, level the tops if needed. Carefully slice each cake in half horizontally to create four slim, even layers. Place your first layer on a serving plate and spread a generous amount of raspberry frosting. Repeat with remaining layers, then frost the top and sides for that signature naked-cake look or a classic frosted finish.
Step 9: Garnish and Chill
Here’s the fun part! Top your Raspberry Layer Cake with fresh raspberries, wafer rolls, small cookies, sprigs of mint, and edible flowers for a truly unforgettable finish. Chill for at least 30 minutes so the layers set and slicing is effortless.
How to Serve Raspberry Layer Cake

Garnishes
To make your Raspberry Layer Cake picture-perfect, generously top it with fresh raspberries and cluster wafer rolls upright for a playful touch. Dot on small cookies or mini meringues, tuck in a few sprigs of fresh mint, and, for extra magic, sprinkle with edible flowers. Each garnish adds charm, color, and texture—don’t be afraid to let your creativity shine.
Side Dishes
While this cake can absolutely steal the spotlight solo, it pairs delightfully with a scoop of vanilla bean ice cream, a dollop of whipped cream, or even a small glass of chilled prosecco. If you’re hosting a spring or summer gathering, consider serving alongside fresh fruit salad or lemon sorbet for a light touch.
Creative Ways to Present
Try slicing the Raspberry Layer Cake into slim, tall wedges and stacking them on a vintage-style cake stand. For parties, cut into mini squares and top each with a single raspberry and a mint leaf. You can even turn the layers into a stunning trifle or serve with extra raspberry sauce for a dramatic drizzle. The opportunities to impress are endless!
Make Ahead and Storage
Storing Leftovers
Store any leftover Raspberry Layer Cake in an airtight container in the refrigerator. The buttercream keeps things moist and tender for up to three days. Be sure to let individual slices come to room temperature before serving for the best texture and flavor.
Freezing
You can freeze unfrosted cake layers double-wrapped in plastic wrap for up to two months. For a whole completed cake, chill it first to set the frosting, then wrap tightly and freeze. Thaw overnight in the refrigerator before unwrapping for best results—your Raspberry Layer Cake will taste just as fresh!
Reheating
While you won’t need to “reheat” this cake in the traditional sense, if your slices are very cold from the fridge, let them sit at room temperature for 30-45 minutes before serving. This brings out the buttercream’s flavor and makes the mouthfeel absolutely dreamy.
FAQs
Can I use frozen raspberries for the frosting?
Absolutely! Thaw the raspberries completely, then puree and strain them before adding to the frosting. You’ll get vibrant color and berry flavor, just like with fresh.
How do I keep my cake layers even?
Use a serrated knife or a cake leveler to slice your layers horizontally and always start with completely cooled cakes. If you’re really committed, weigh the batter as you divide it for perfect uniform layers!
Can I make this cake gluten-free?
Yes! Substitute your favorite cup-for-cup gluten-free flour blend for the all-purpose flour. Check the packaging for any other needed modifications and enjoy your gluten-free Raspberry Layer Cake.
What if I don’t have two round pans?
No worries—bake the batter in one tall pan and slice it carefully into layers when cool, or bake in different-shaped pans and trim to fit. The charm of a Raspberry Layer Cake is in the taste, not the perfection of its shape!
How do I prevent the buttercream from splitting?
Make sure your butter is soft, not melted, and add the raspberry puree slowly. If things look a little curdled, keep beating—it usually comes back together as the ingredients emulsify.
Final Thoughts
If you’ve been searching for a cake that’s as joyful as it is delicious, Raspberry Layer Cake is your new go-to recipe! There’s something magical about those swirled layers and fresh berry flavor that make every occasion extra special. Try it soon—you might just create a new tradition!