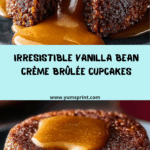
If you’re seeking that showstopping dessert your friends will talk about for weeks, Vanilla Bean Crème Brûlée Cupcakes are here to steal the spotlight. These cupcakes are a dreamy marriage of light, vanilla-speckled cake with hidden pockets of creamy custard, all crowned with the irresistible crackle of a caramelized sugar top. From their beguiling aroma to that first satisfying “crack,” every bite is an experience you’ll want to revisit, whether it’s for a celebration or a cozy night in.

Ingredients You’ll Need
The secret to truly memorable Vanilla Bean Crème Brûlée Cupcakes is all in the details—each ingredient plays a crucial role in building their rich flavor, sumptuous texture, and that signature brûlée crunch. Let’s take a closer look at what you’ll need and why each element matters:
- All-purpose flour: Gives the cupcakes a tender, sturdy structure that holds up perfectly to the creamy filling and brûléed top.
- Baking powder: This is your ticket to fluffy, perfectly-risen cupcakes every single time.
- Salt: A tiny bit amplifies all the sweet and vanilla notes in the batter.
- Unsalted butter, softened: Provides richness and that melt-in-your-mouth crumb—make sure it’s room temperature for easy mixing.
- Granulated sugar: Sweetens both the cake and custard, and adds the caramelized crunch on top.
- Large eggs: Egg yolks are essential for silky custard, while the whole eggs help the cupcakes rise and set.
- Vanilla bean paste: This ingredient is the magic—those little specks bring unmatched flavor and aroma.
- Whole milk: Gives a moist, soft crumb without making the cupcakes heavy.
- Heavy cream: For a decadent, velvety custard filling that echoes the best part of crème brûlée.
How to Make Vanilla Bean Crème Brûlée Cupcakes
Step 1: Prep the Cupcake Liners and Oven
Start by preheating your oven to 350°F (175°C) for optimal baking. Line a 12-cup muffin tin with cupcake liners to ensure effortless removal and a tidy, uniform appearance. This step sets the stage for baking success—no one wants cupcakes sticking to the pan!
Step 2: Whisk Together Dry Ingredients
In a medium bowl, whisk together the flour, baking powder, and salt. This not only distributes the leavening evenly but also aerates the flour, which results in lighter cupcakes.
Step 3: Cream Butter and Sugar, Then Add Eggs & Vanilla Bean Paste
In a large mixing bowl, cream the softened butter and granulated sugar until light and fluffy—this usually takes about 2-3 minutes. Beat in the eggs one at a time, then add the vanilla bean paste. Here’s where your cupcakes get their delicate crumb and signature vanilla bean flecks.
Step 4: Combine Wet and Dry Ingredients, Then Bake
Gradually add the dry mixture to the creamed butter, alternating with the milk. Start and end with the dry ingredients to avoid overmixing. Once combined, spoon the batter into your prepared liners, filling each about two-thirds full. Bake for 18-20 minutes, or until a toothpick comes out clean. Let them cool completely before the real fun begins.
Step 5: Make the Silky Custard Filling
While the cupcakes cool, prepare the luscious custard. Heat the heavy cream in a small saucepan until it’s steaming, but not boiling. In a bowl, whisk together egg yolks, sugar, and another generous teaspoon of vanilla bean paste. Gently stream the hot cream into the yolks while whisking to prevent curdling, then return the mixture to the saucepan. Cook over low heat, stirring constantly, until it thickens. Once it coats the back of a spoon, remove from heat and chill thoroughly—it thickens more as it cools, making it easier to fill the cupcakes.
Step 6: Core and Fill the Cupcakes
Use a small knife or cupcake corer to remove the center from each cooled cupcake (don’t go all the way through). Pipe or spoon the chilled custard into each cavity, then replace the cake “lid” if you’d like. This surprise-filled center is pure joy when you take a bite!
Step 7: Caramelize the Sugar Topping
Right before serving, sprinkle a thin, even layer of granulated sugar over the tops of your filled cupcakes. Using a kitchen torch, carefully torch the sugar until it bubbles and turns a deep, golden caramel color. Let the tops cool for a minute, and get ready for that classic crème brûlée “crack.”
How to Serve Vanilla Bean Crème Brûlée Cupcakes

Garnishes
These cupcakes are already a head-turner, but a finishing touch can really make them pop. Try a few fresh raspberries, a sprig of mint, or a dusting of powdered sugar around the plate. Edible flowers also add an elegant, special-occasion flair to each Vanilla Bean Crème Brûlée Cupcake.
Side Dishes
Pairing your Vanilla Bean Crème Brûlée Cupcakes with a scoop of vanilla or berry sorbet, or even a side of lightly whipped cream, transforms the dessert into a true indulgence. For a beverage pairing, a bold espresso, black tea, or sparkling dessert wine complements the creamy sweetness and balances every bite.
Creative Ways to Present
Looking for ways to wow your guests? Arrange the cupcakes on a tiered cake stand for an instant centerpiece. You can also serve them in individual ramekins or teacups, mimicking the sophistication of classic crème brûlée. Even serving them with tiny dessert spoons sets a playful, interactive mood—everyone will love cracking through that caramel top!
Make Ahead and Storage
Storing Leftovers
If you happen to have leftovers, store your Vanilla Bean Crème Brûlée Cupcakes in an airtight container in the refrigerator. The caramel tops will soften over time, but the cupcakes stay moist and the custard luscious for up to 3 days—just wait to brûlée until right before serving for the best crunch.
Freezing
The cupcakes (without custard or caramel topping) freeze beautifully for up to 2 months. Wrap tightly in plastic wrap and place in a freezer bag. When ready to enjoy, thaw at room temperature, prepare the custard, fill, and brûlée for a “freshly made” treat any time.
Reheating
If you’ve chilled the cupcakes and want to bring them back to a softer texture, let them sit at room temperature for about 30 minutes before serving. Avoid microwaving, as it will melt the custard and ruin the caramel top—always brûlée just before enjoying for that signature crackle.
FAQs
Can I make Vanilla Bean Crème Brûlée Cupcakes without a kitchen torch?
Yes! A broiler works in a pinch. Place the sugared cupcakes under the broiler for about a minute, but watch very closely to avoid burning. The torch, however, does give you more control and that perfect caramel finish.
Can I use vanilla extract instead of vanilla bean paste?
You can substitute vanilla extract if needed, but vanilla bean paste gives deeper flavor and those pretty black specks. If using extract, increase the amount by about half and know your cupcakes may lack some of that gourmet appeal.
How do I prevent the custard from curdling?
The key is to add the hot cream very slowly to the egg yolks while constantly whisking. This gradually raises the temperature of the yolks so they cook gently and stay silky-smooth.
Can I make the custard filling in advance?
Absolutely! Prepare the custard up to two days ahead and keep it chilled in a covered bowl. When you’re ready to assemble, just give it a gentle stir before filling your Vanilla Bean Crème Brûlée Cupcakes.
Why did my caramel topping turn sticky instead of crisp?
If the caramel layer is too thick or if there’s moisture on the sugar, it can become sticky. Use a thin, even layer of sugar and make sure your cupcakes are dry before torching for the classic glassy finish.
Final Thoughts
There’s something downright magical about creating Vanilla Bean Crème Brûlée Cupcakes from scratch—the anticipation, that signature crackle, and the delight of discovering creamy custard inside. If you love the elegance of crème brûlée and the fun of cupcakes, this is the dessert you absolutely need to try. Happy baking, and get ready for the oohs and aahs!